Adding or editing shooting days
How to add, move, and delete shooting days and off days
Once your schedule has days on it, you can add more, insert one in the middle, adjust the breaks between them, move dates, change day numbers, and delete days you no longer need.
Add a shooting day
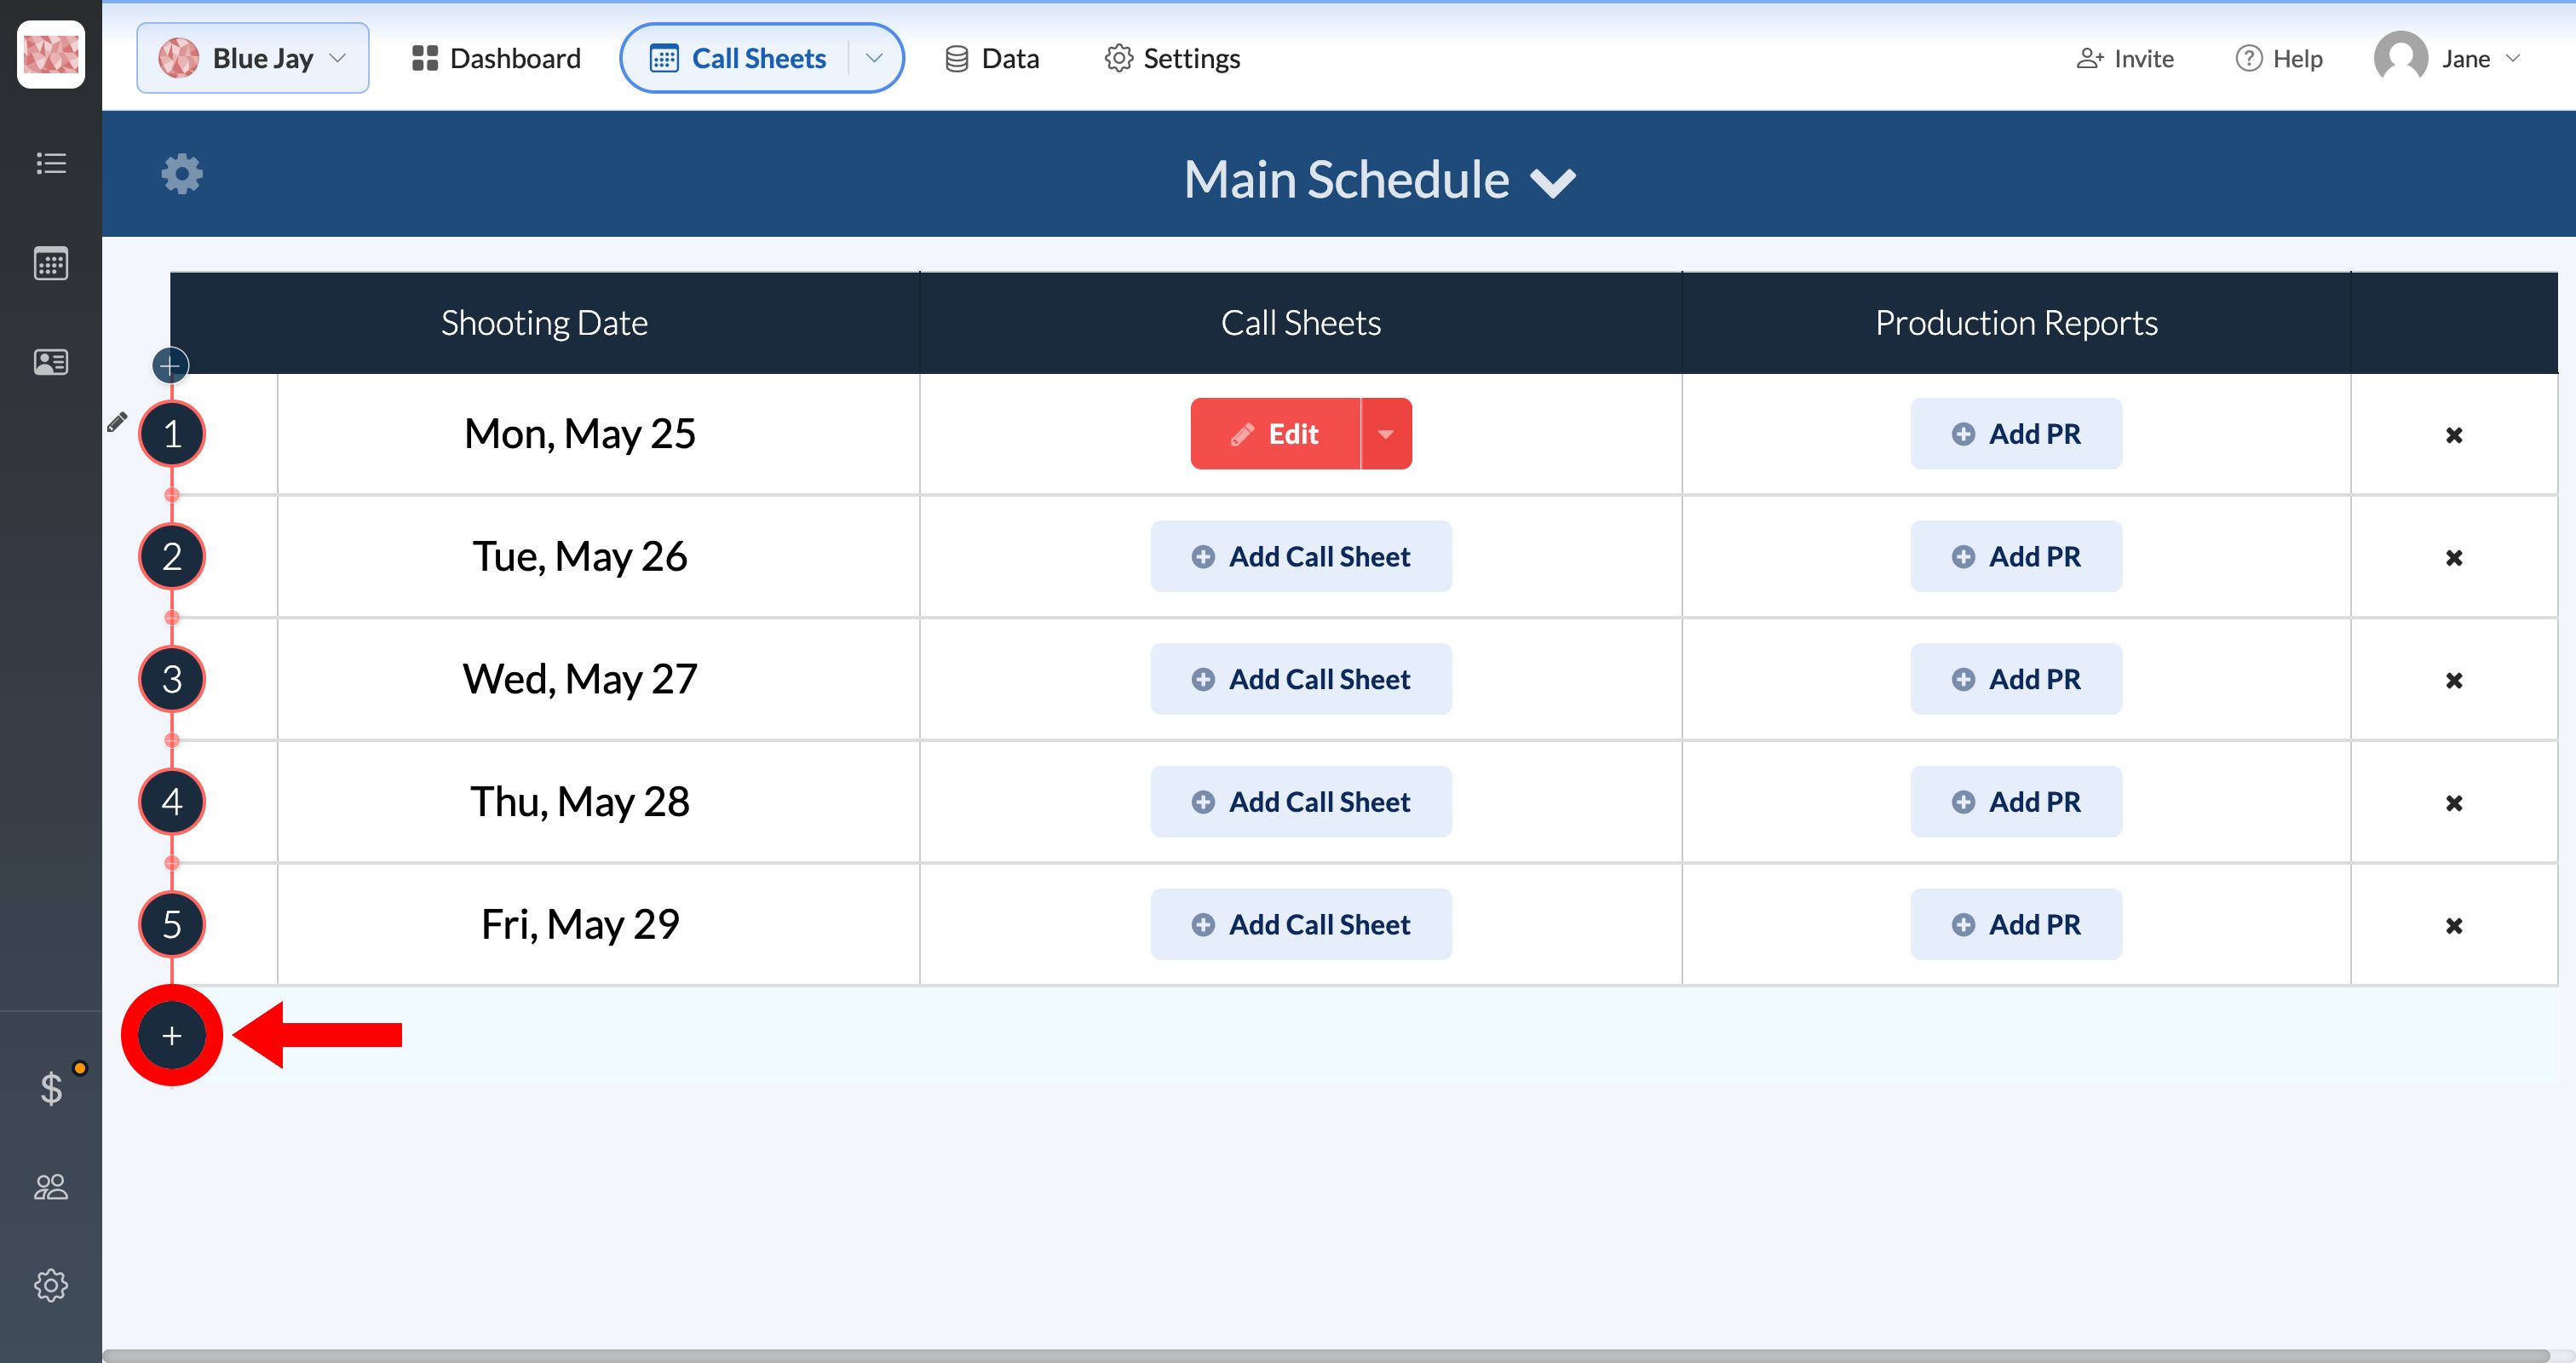
Scroll to the bottom of the Call Sheets page and click + Add a Day. The new day is appended to the end of the schedule.
Note: Adding days doesn't update the Total Days setting. If your call sheet header shows "of 12", update the total afterward. See Setting the day numbering (Day 3 of 12).
Insert a day before another
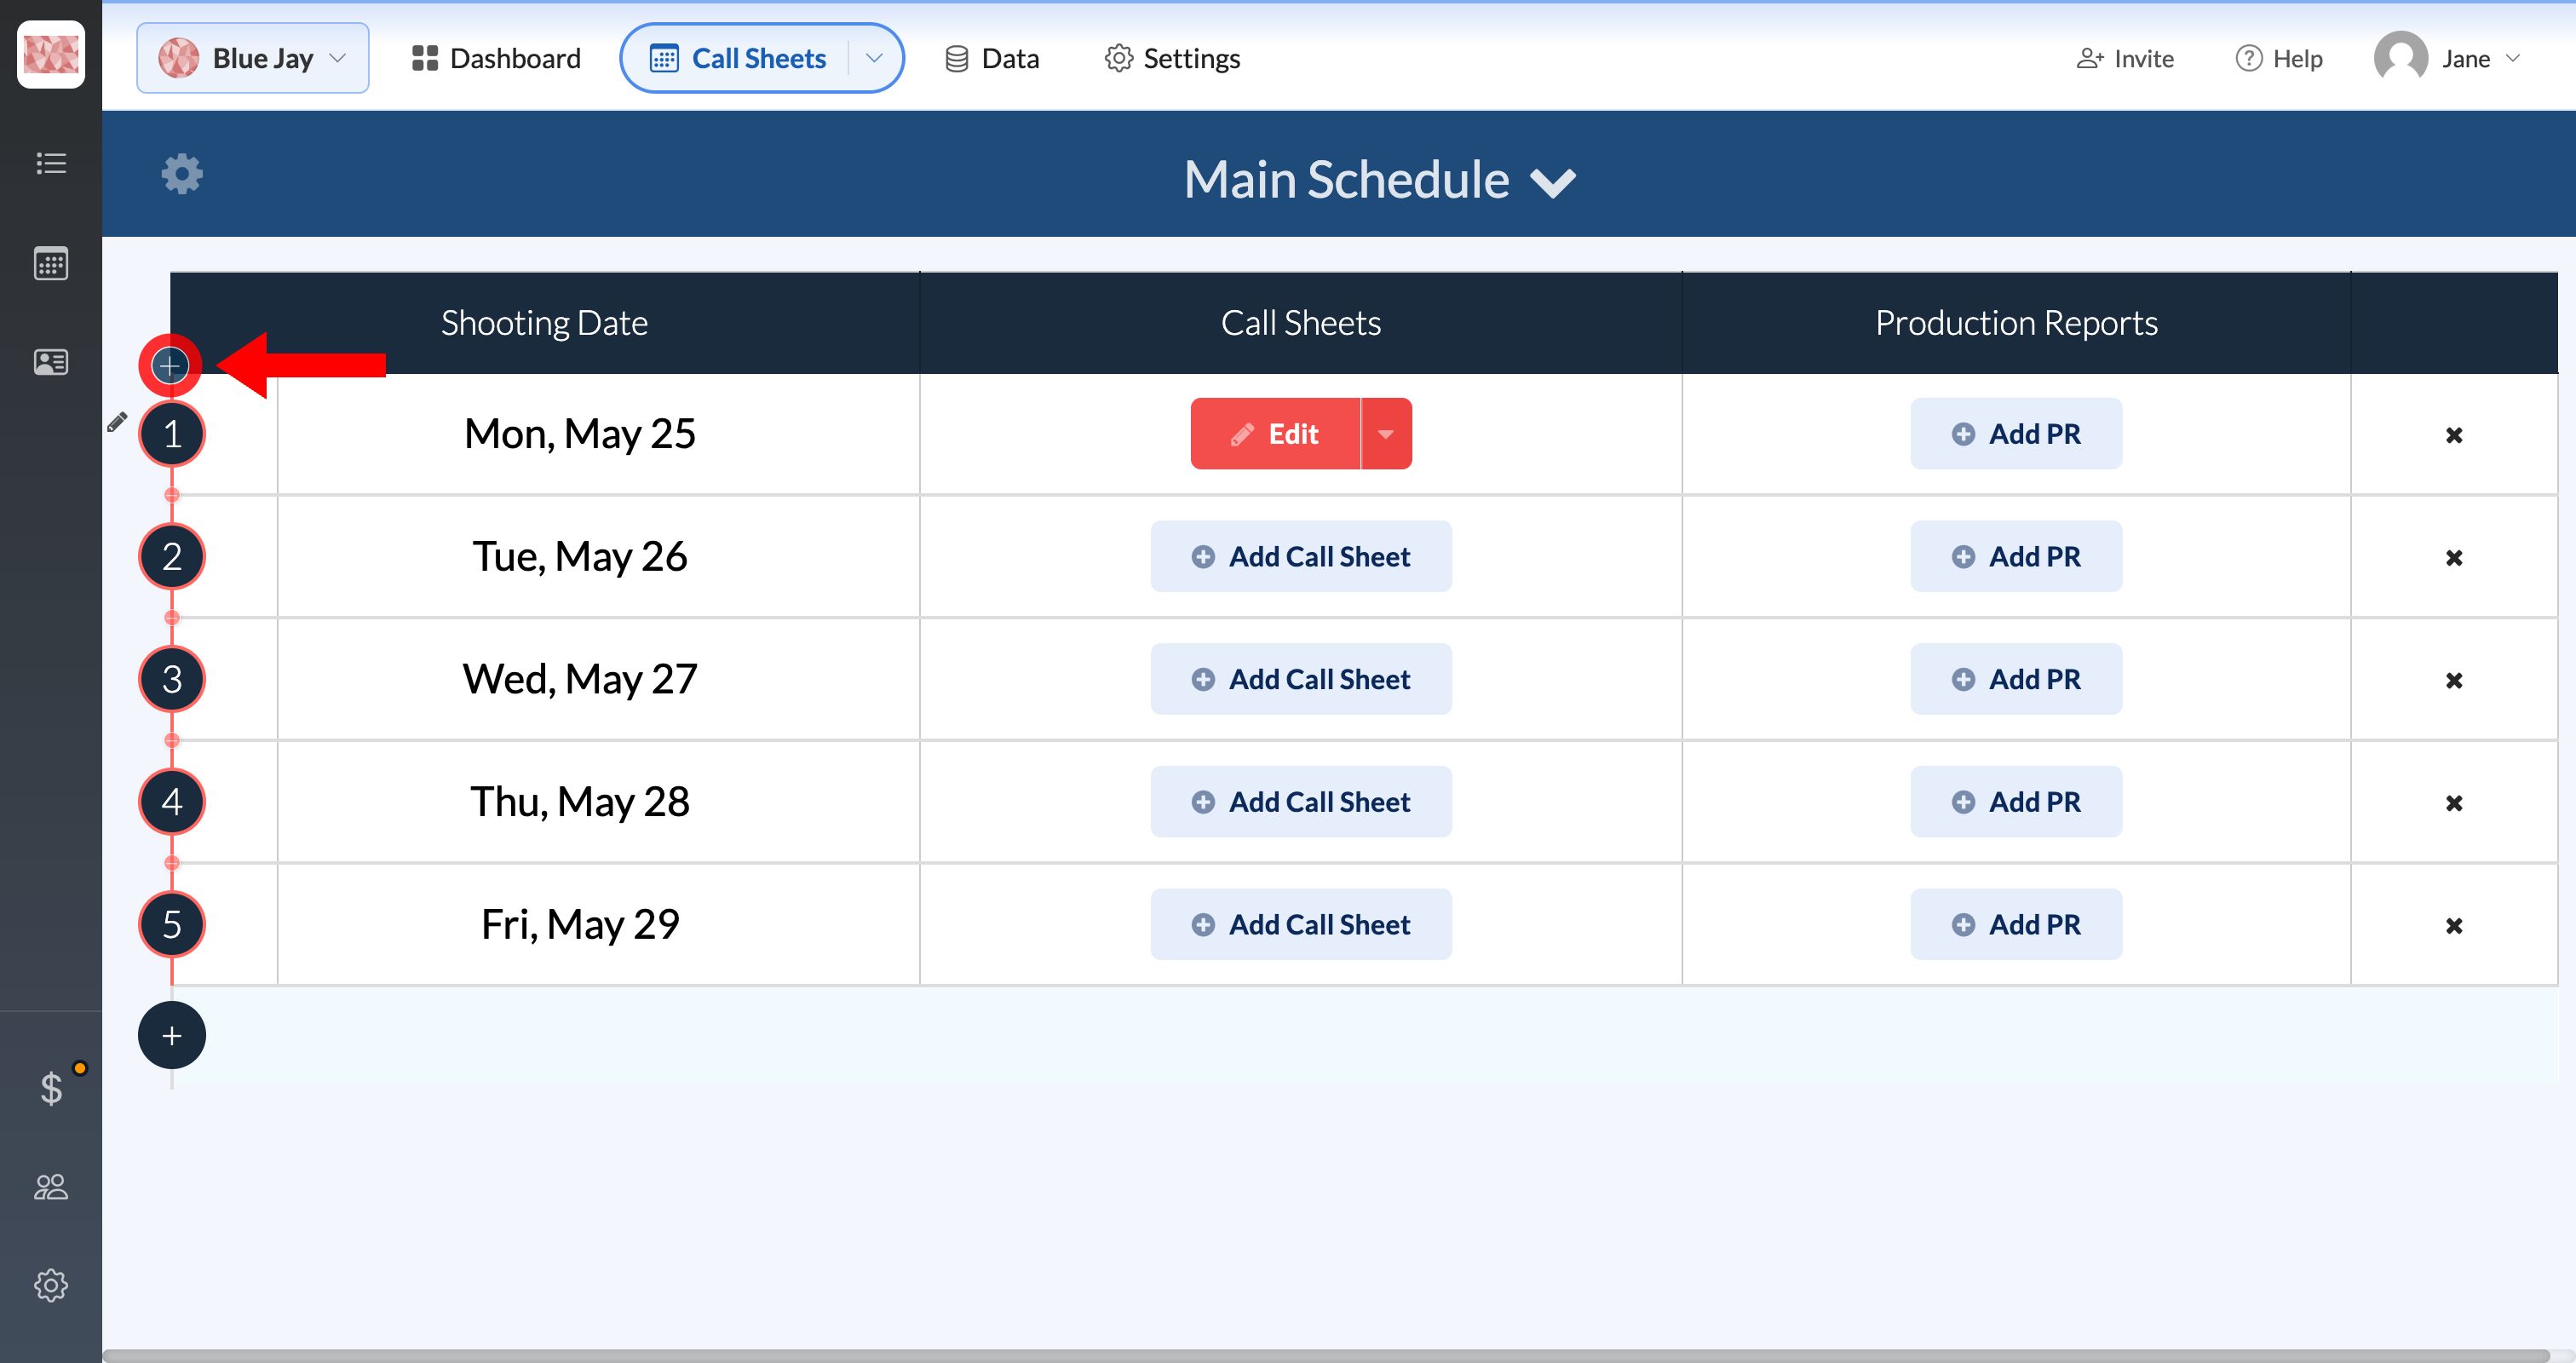
Hover the day number at the far left of a row. An Insert Day Before plus icon appears. Click it to add a new day immediately above that row.
Add or adjust off days
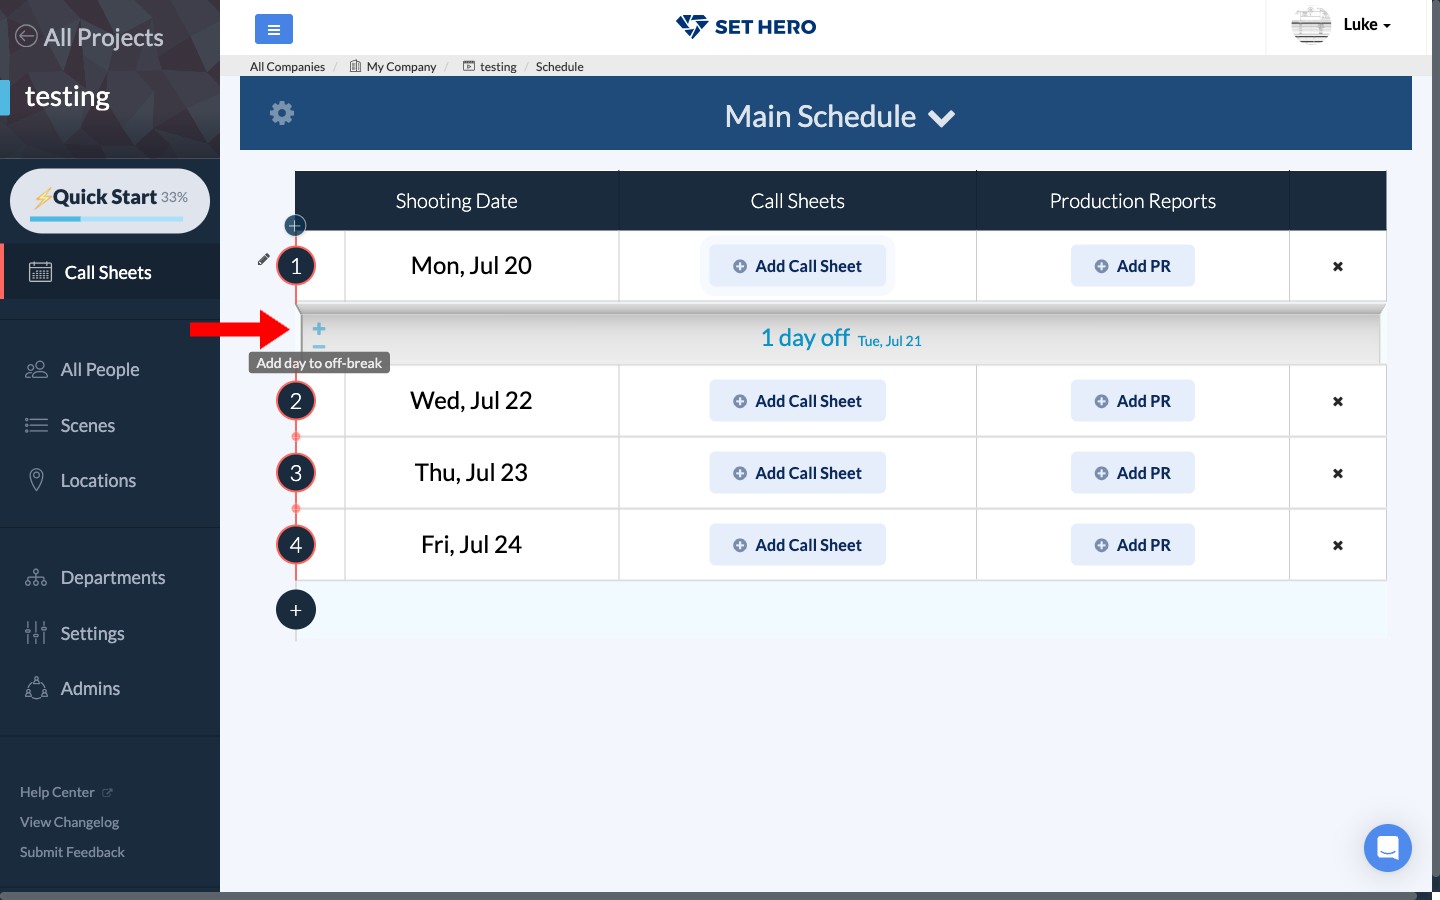
You can put a break between two shooting days or change the length of an existing one. Every change shifts the lower shooting day and everything after it by one calendar day.
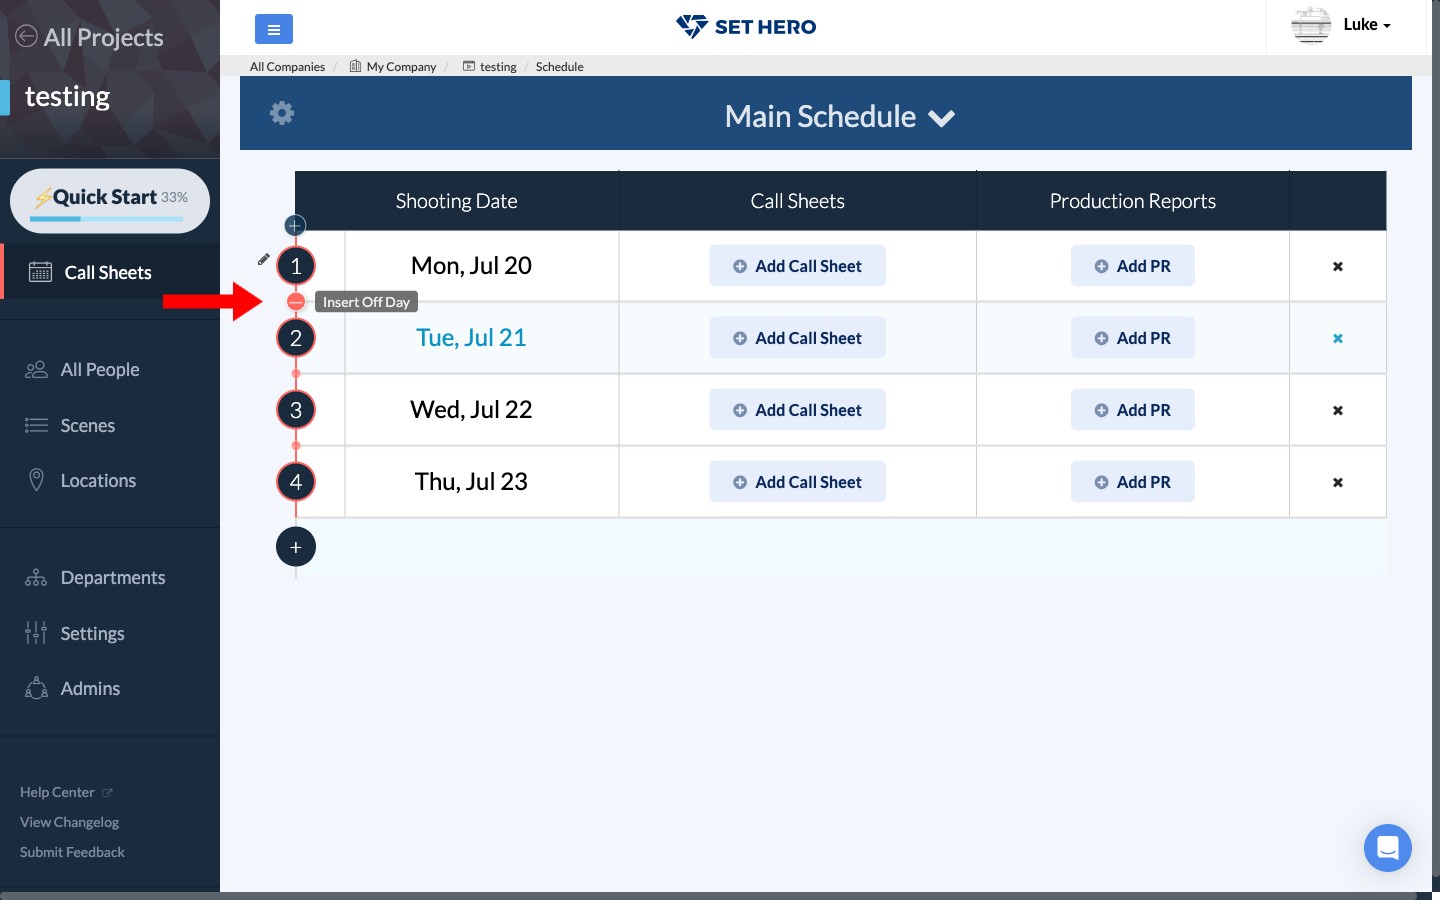
To add a break, hover the control to the left of the lower shooting day and click Insert Off Day.
Once a break exists, an off-day bar shows how many days it covers. Click + to lengthen it or − to shorten it.
Change a date
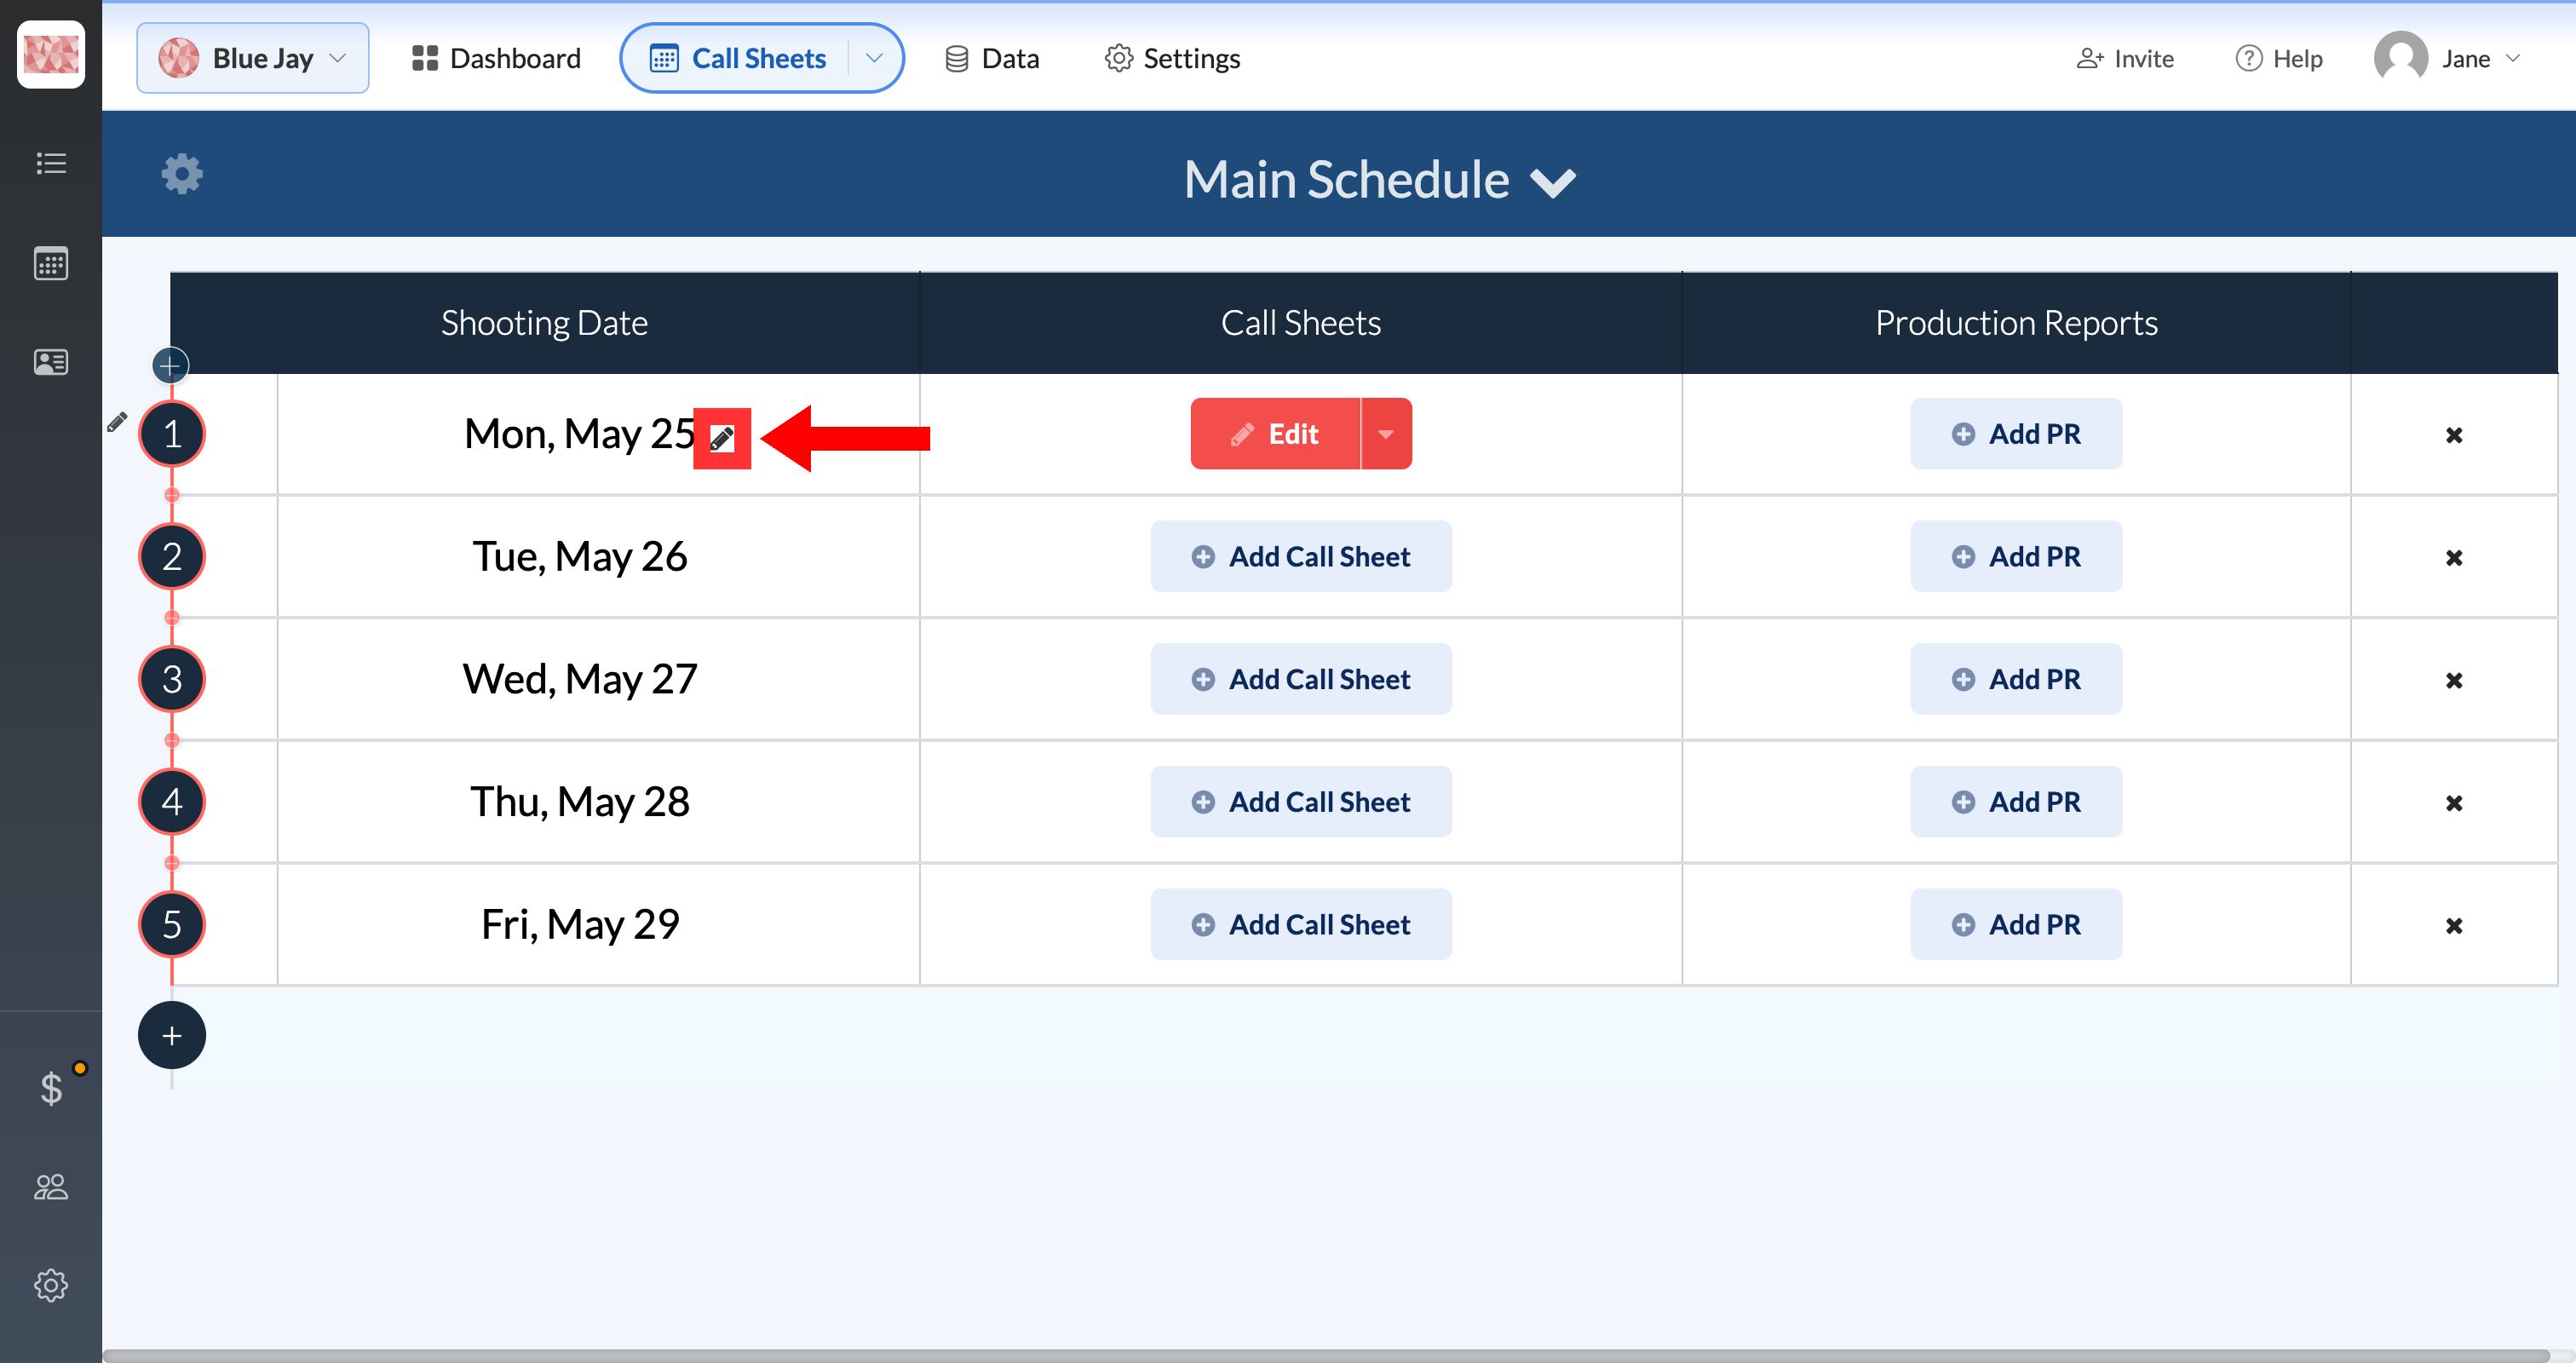
Hover the date and click the pencil icon.
In Edit Date, pick the new date, then choose what moves:
- Update only this day's date changes this day and leaves the others where they are. This is selected by default.
- Cascade date shift to all future days also moves this day and every later day by the same number of days, forward or backward. Earlier days keep their dates.
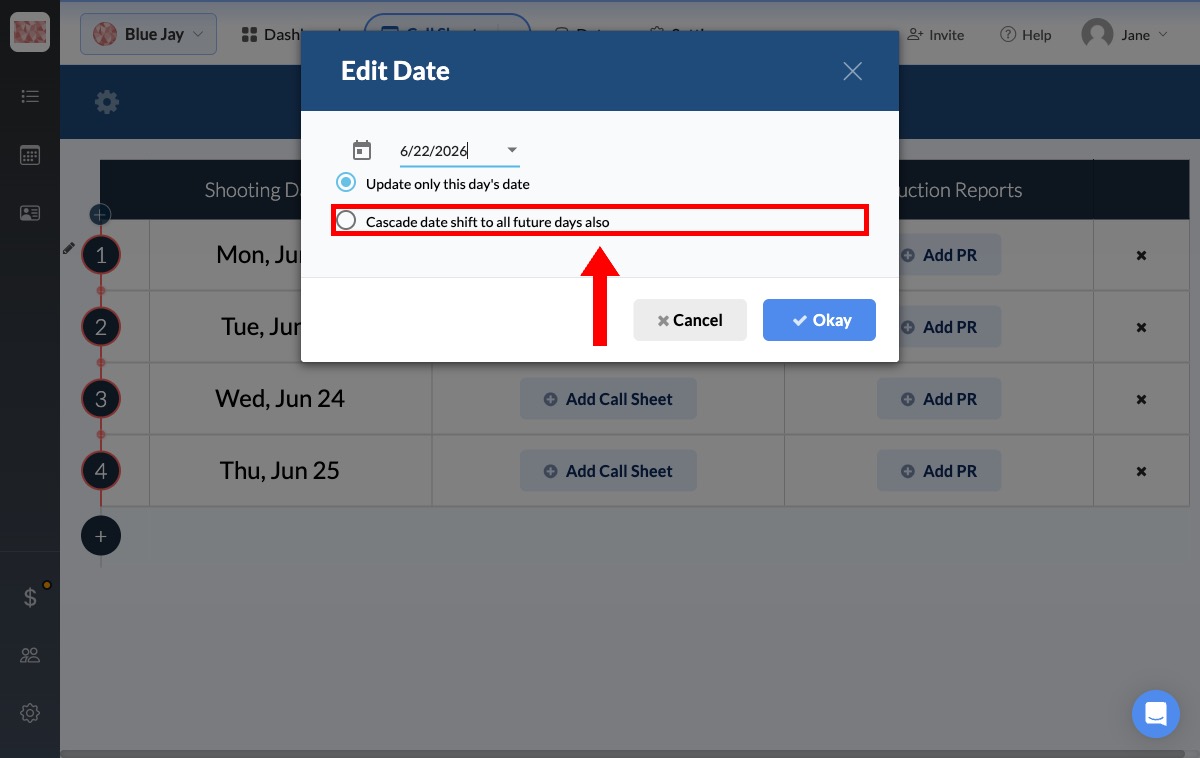
Click Okay to save.
Tip: To move a block of days in the middle of your schedule, edit the first day that needs to move and use Cascade date shift to all future days also.
Change the starting day number
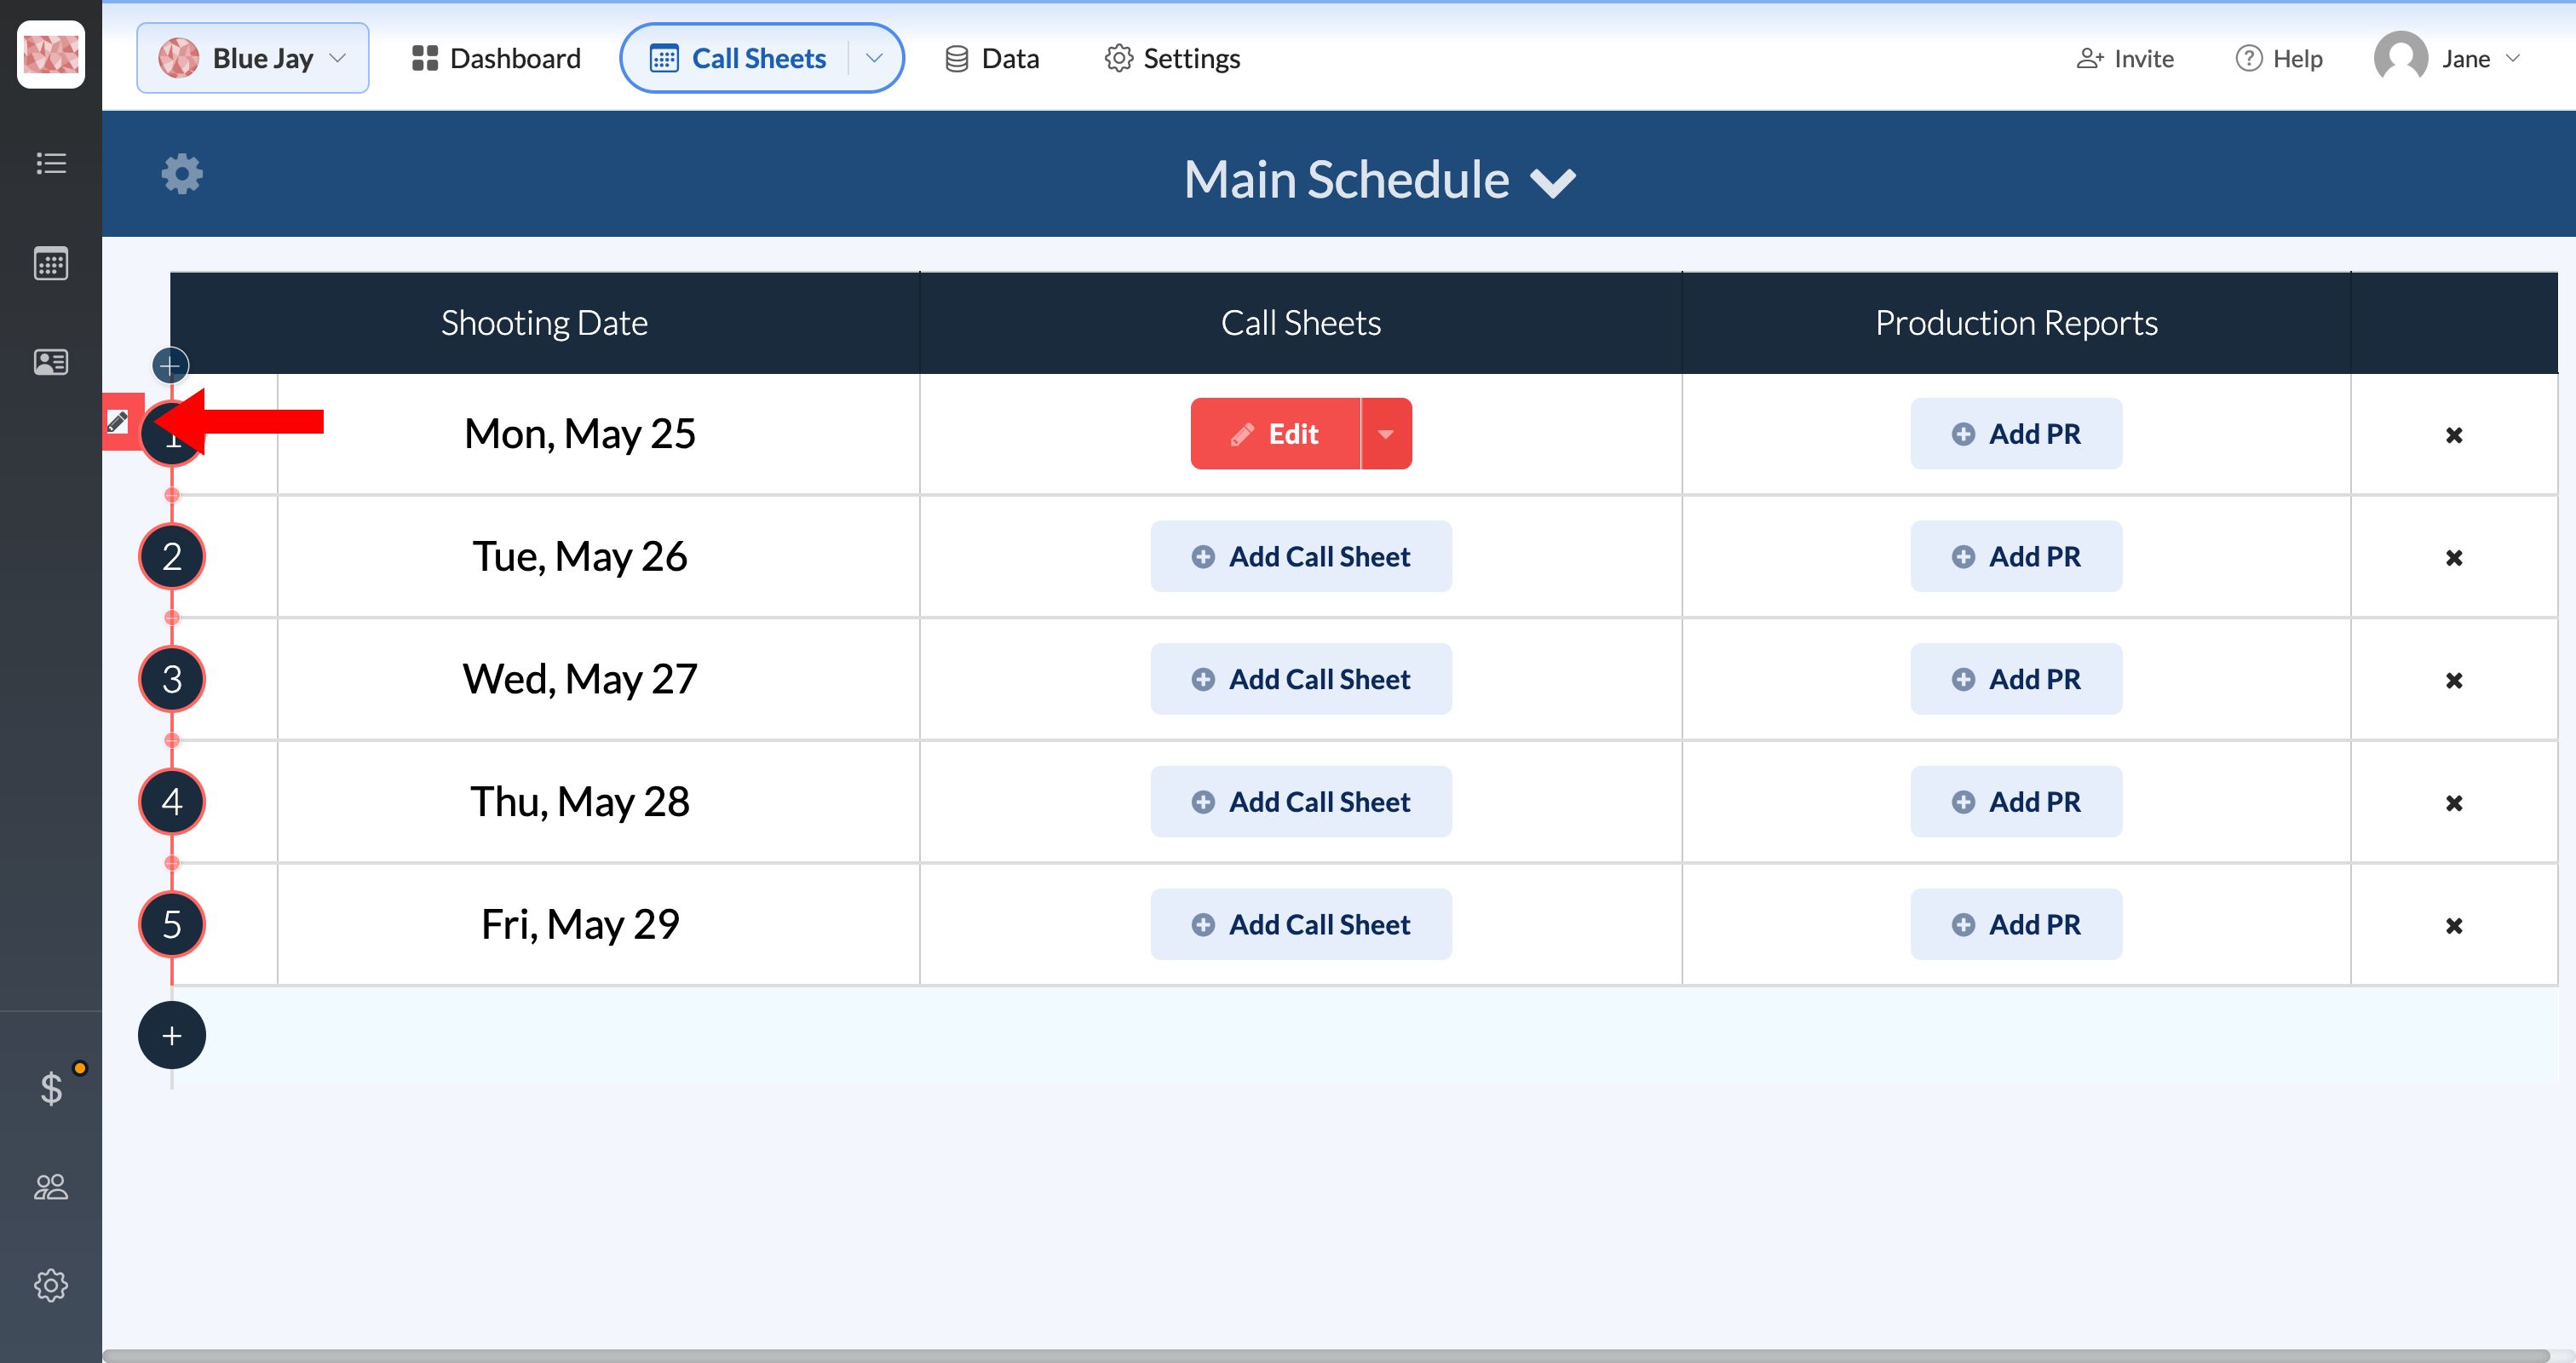
To start the schedule at something other than Day 1, such as when you're continuing from an earlier schedule, hover the day number on the first row and click its pencil icon. Enter the new starting number and every later day renumbers automatically.
Delete a shooting day
Warning: Deleting a day permanently deletes every call sheet and production report attached to it. This can't be undone.
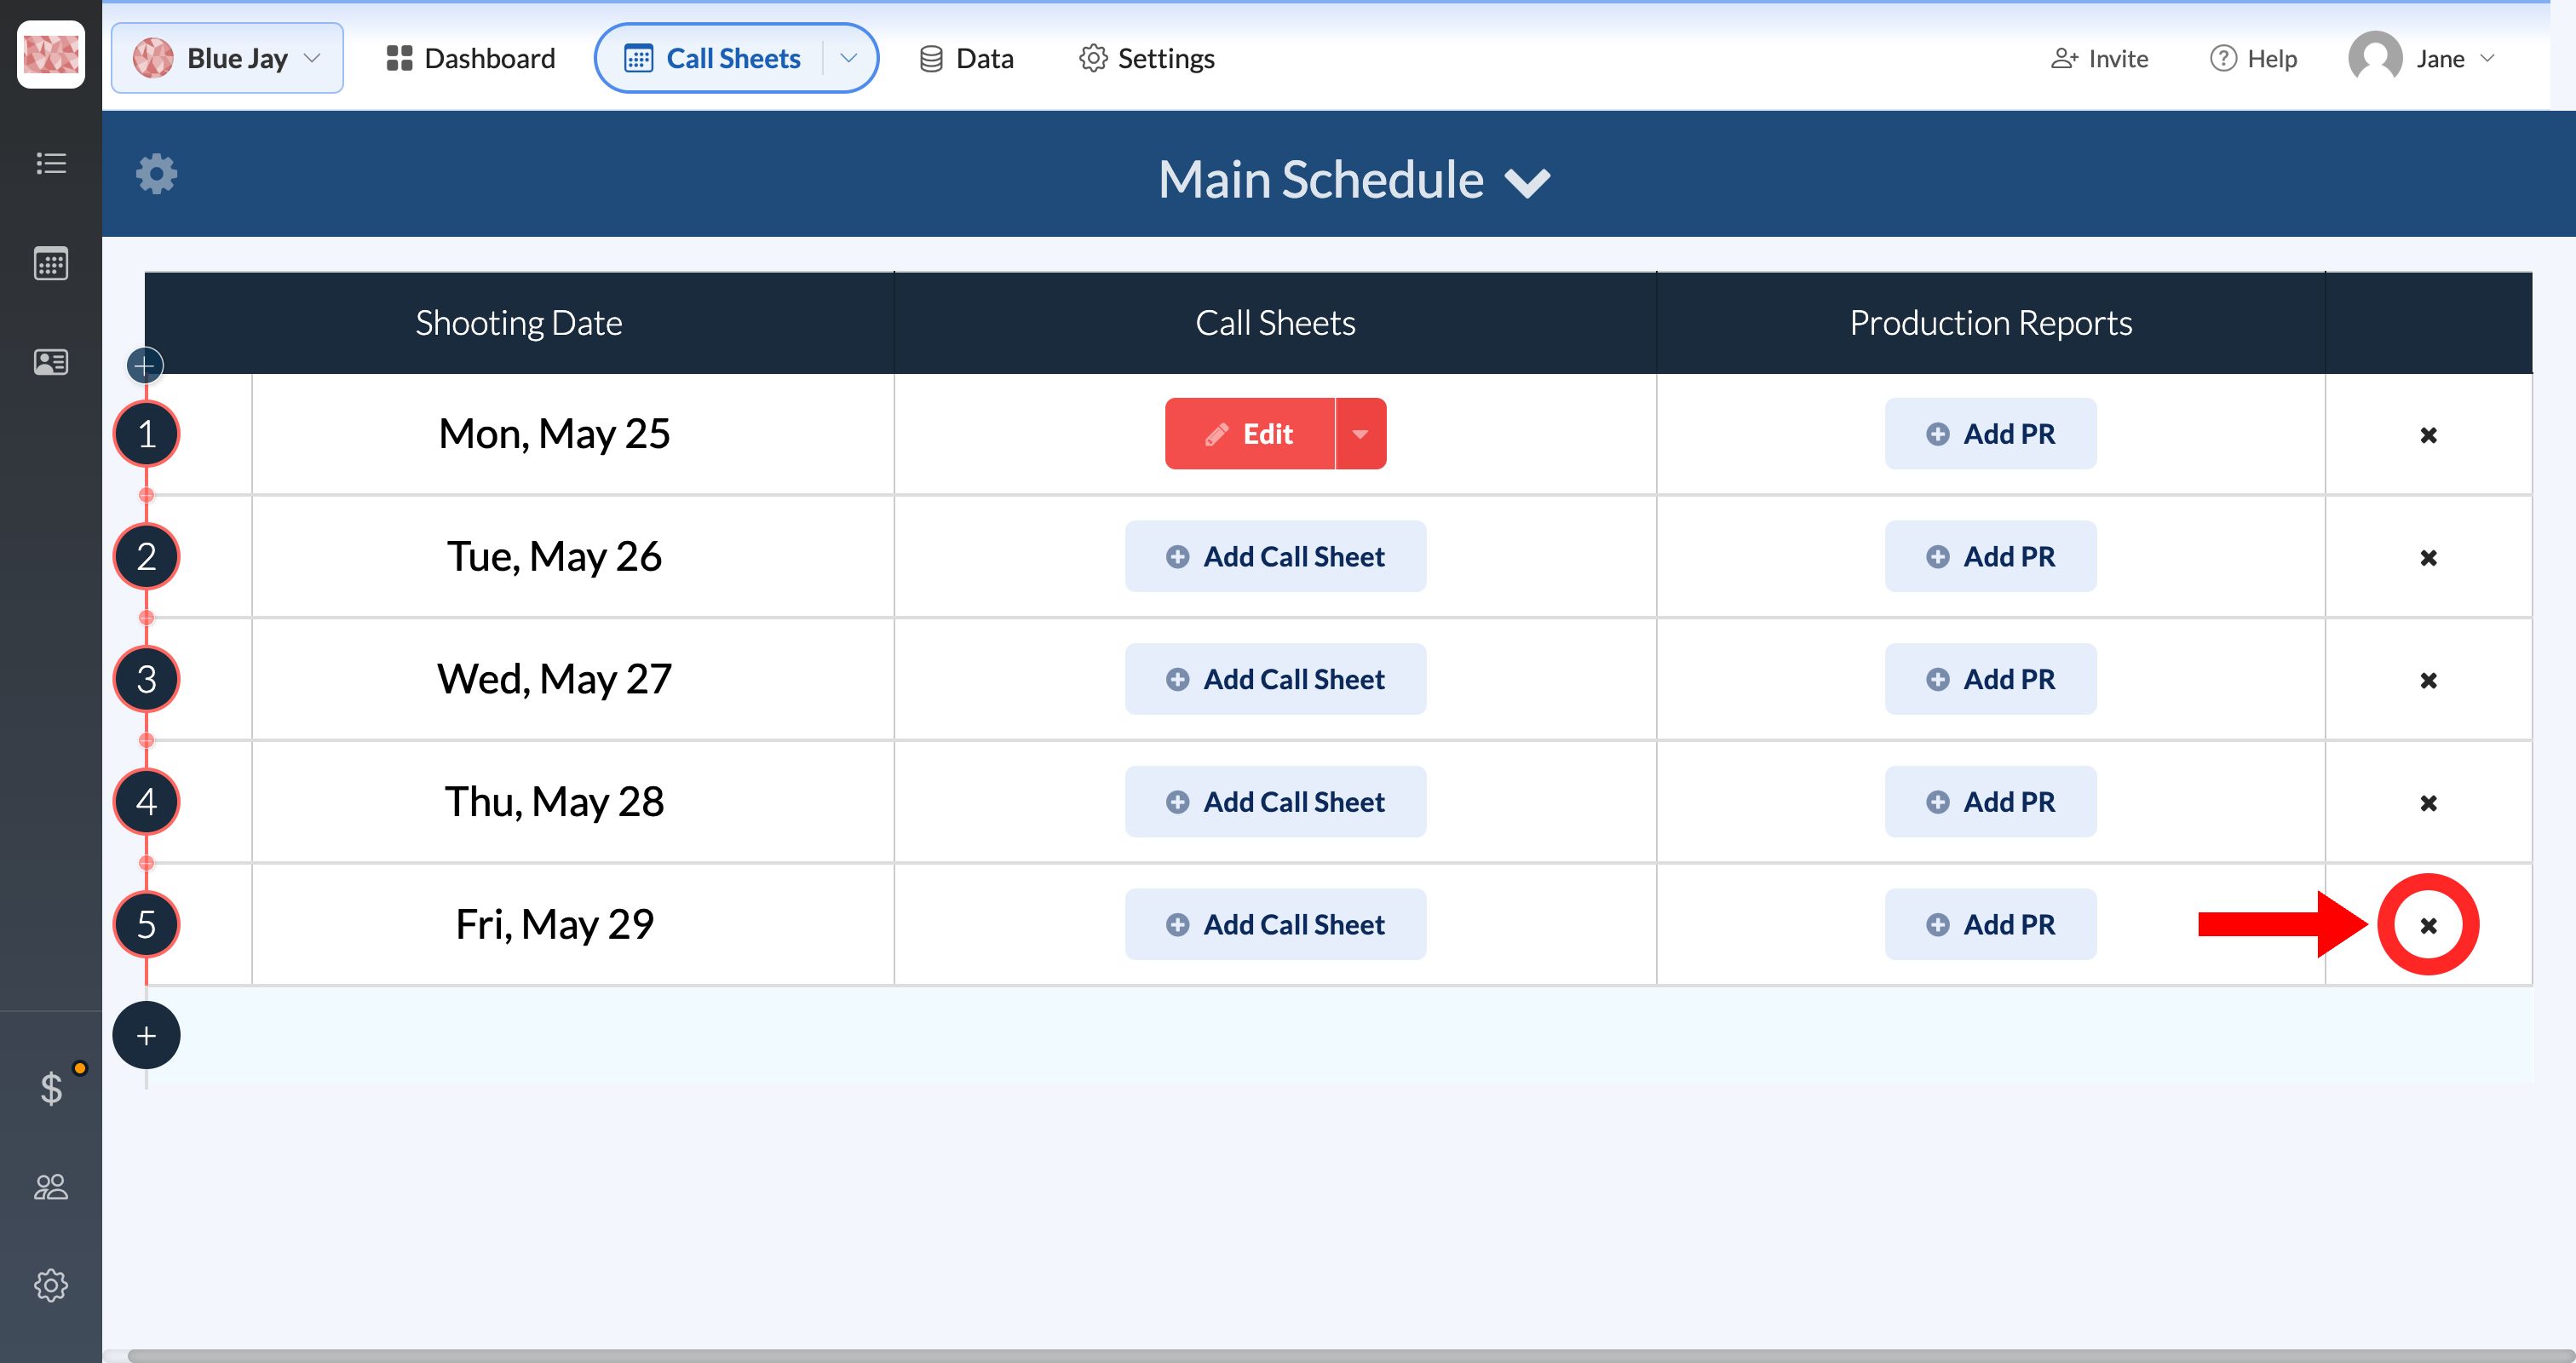
Hover the row and click the Delete Day (X) icon on the far right, then click Delete in the confirmation.