Your first call sheet in 15 minutes
How to build, preview, and prepare your first call sheet
Starting from your company's Active Projects page, you can build a simple call sheet and have it ready to publish in about 15 minutes. This guide sticks to the essentials for a one-day production.
Create a new project
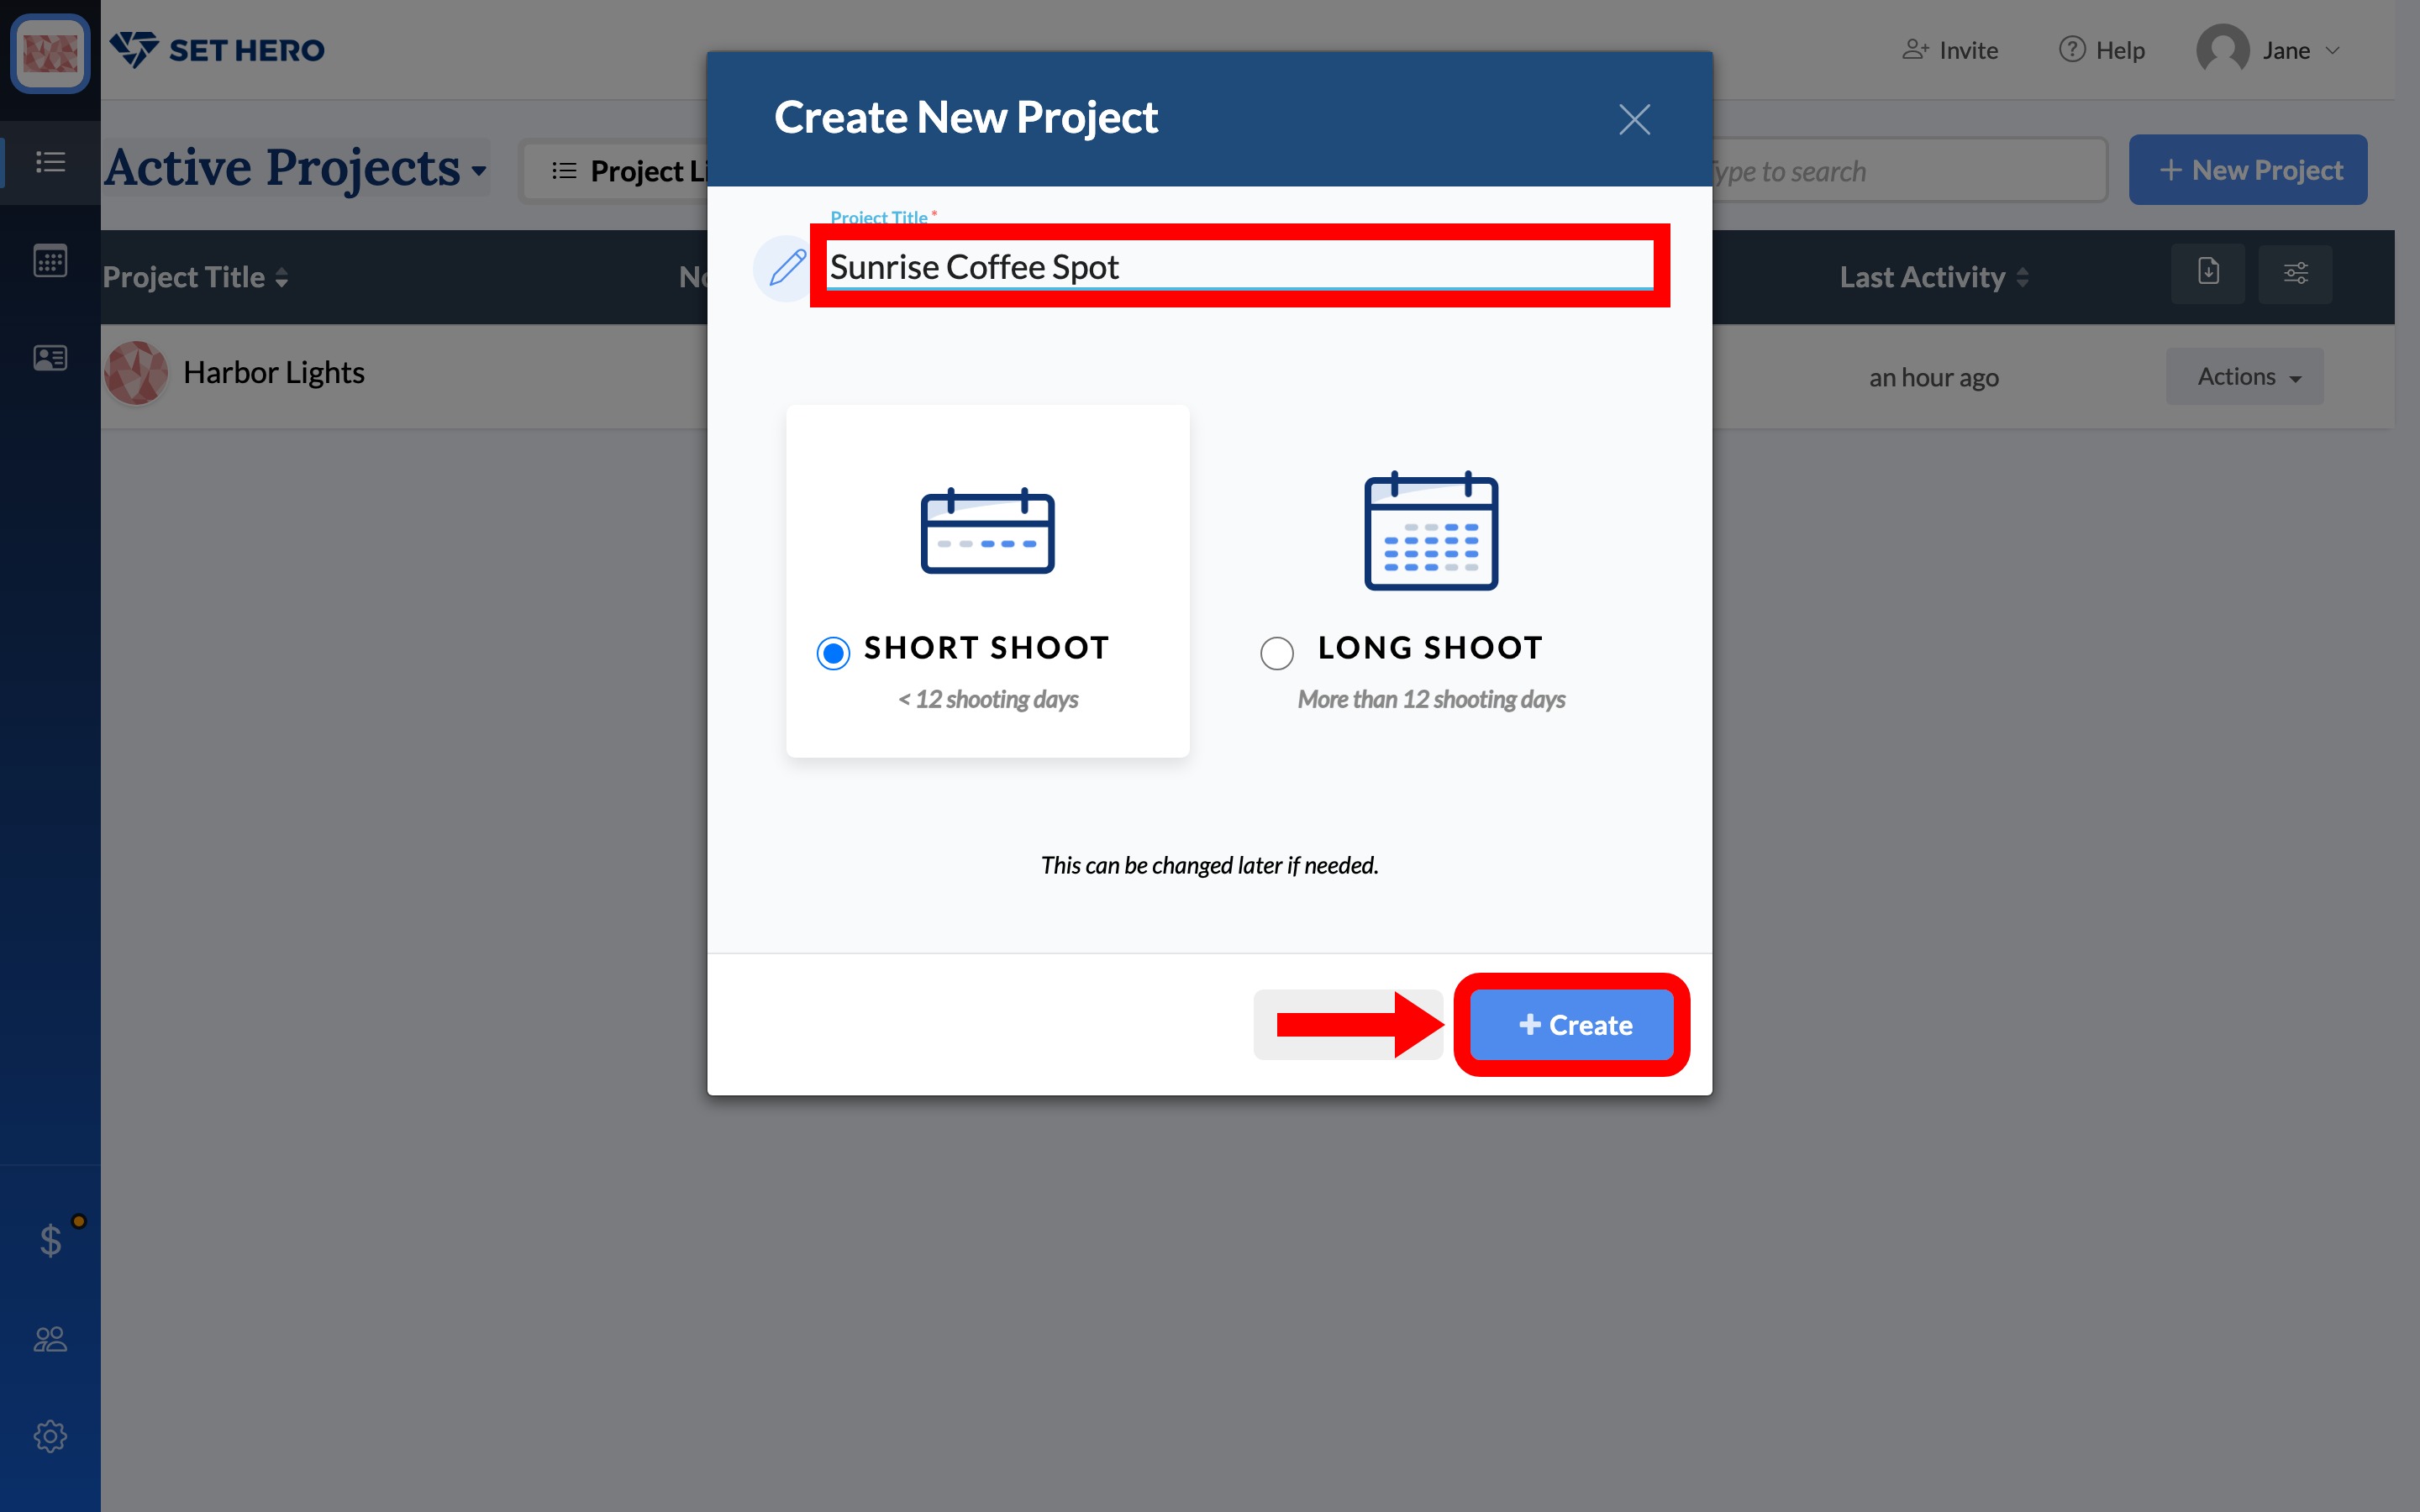
Select New Project. Enter Sunrise Coffee Spot as the project title, keep Short Shoot selected, and select Create.
Set up your shoot day
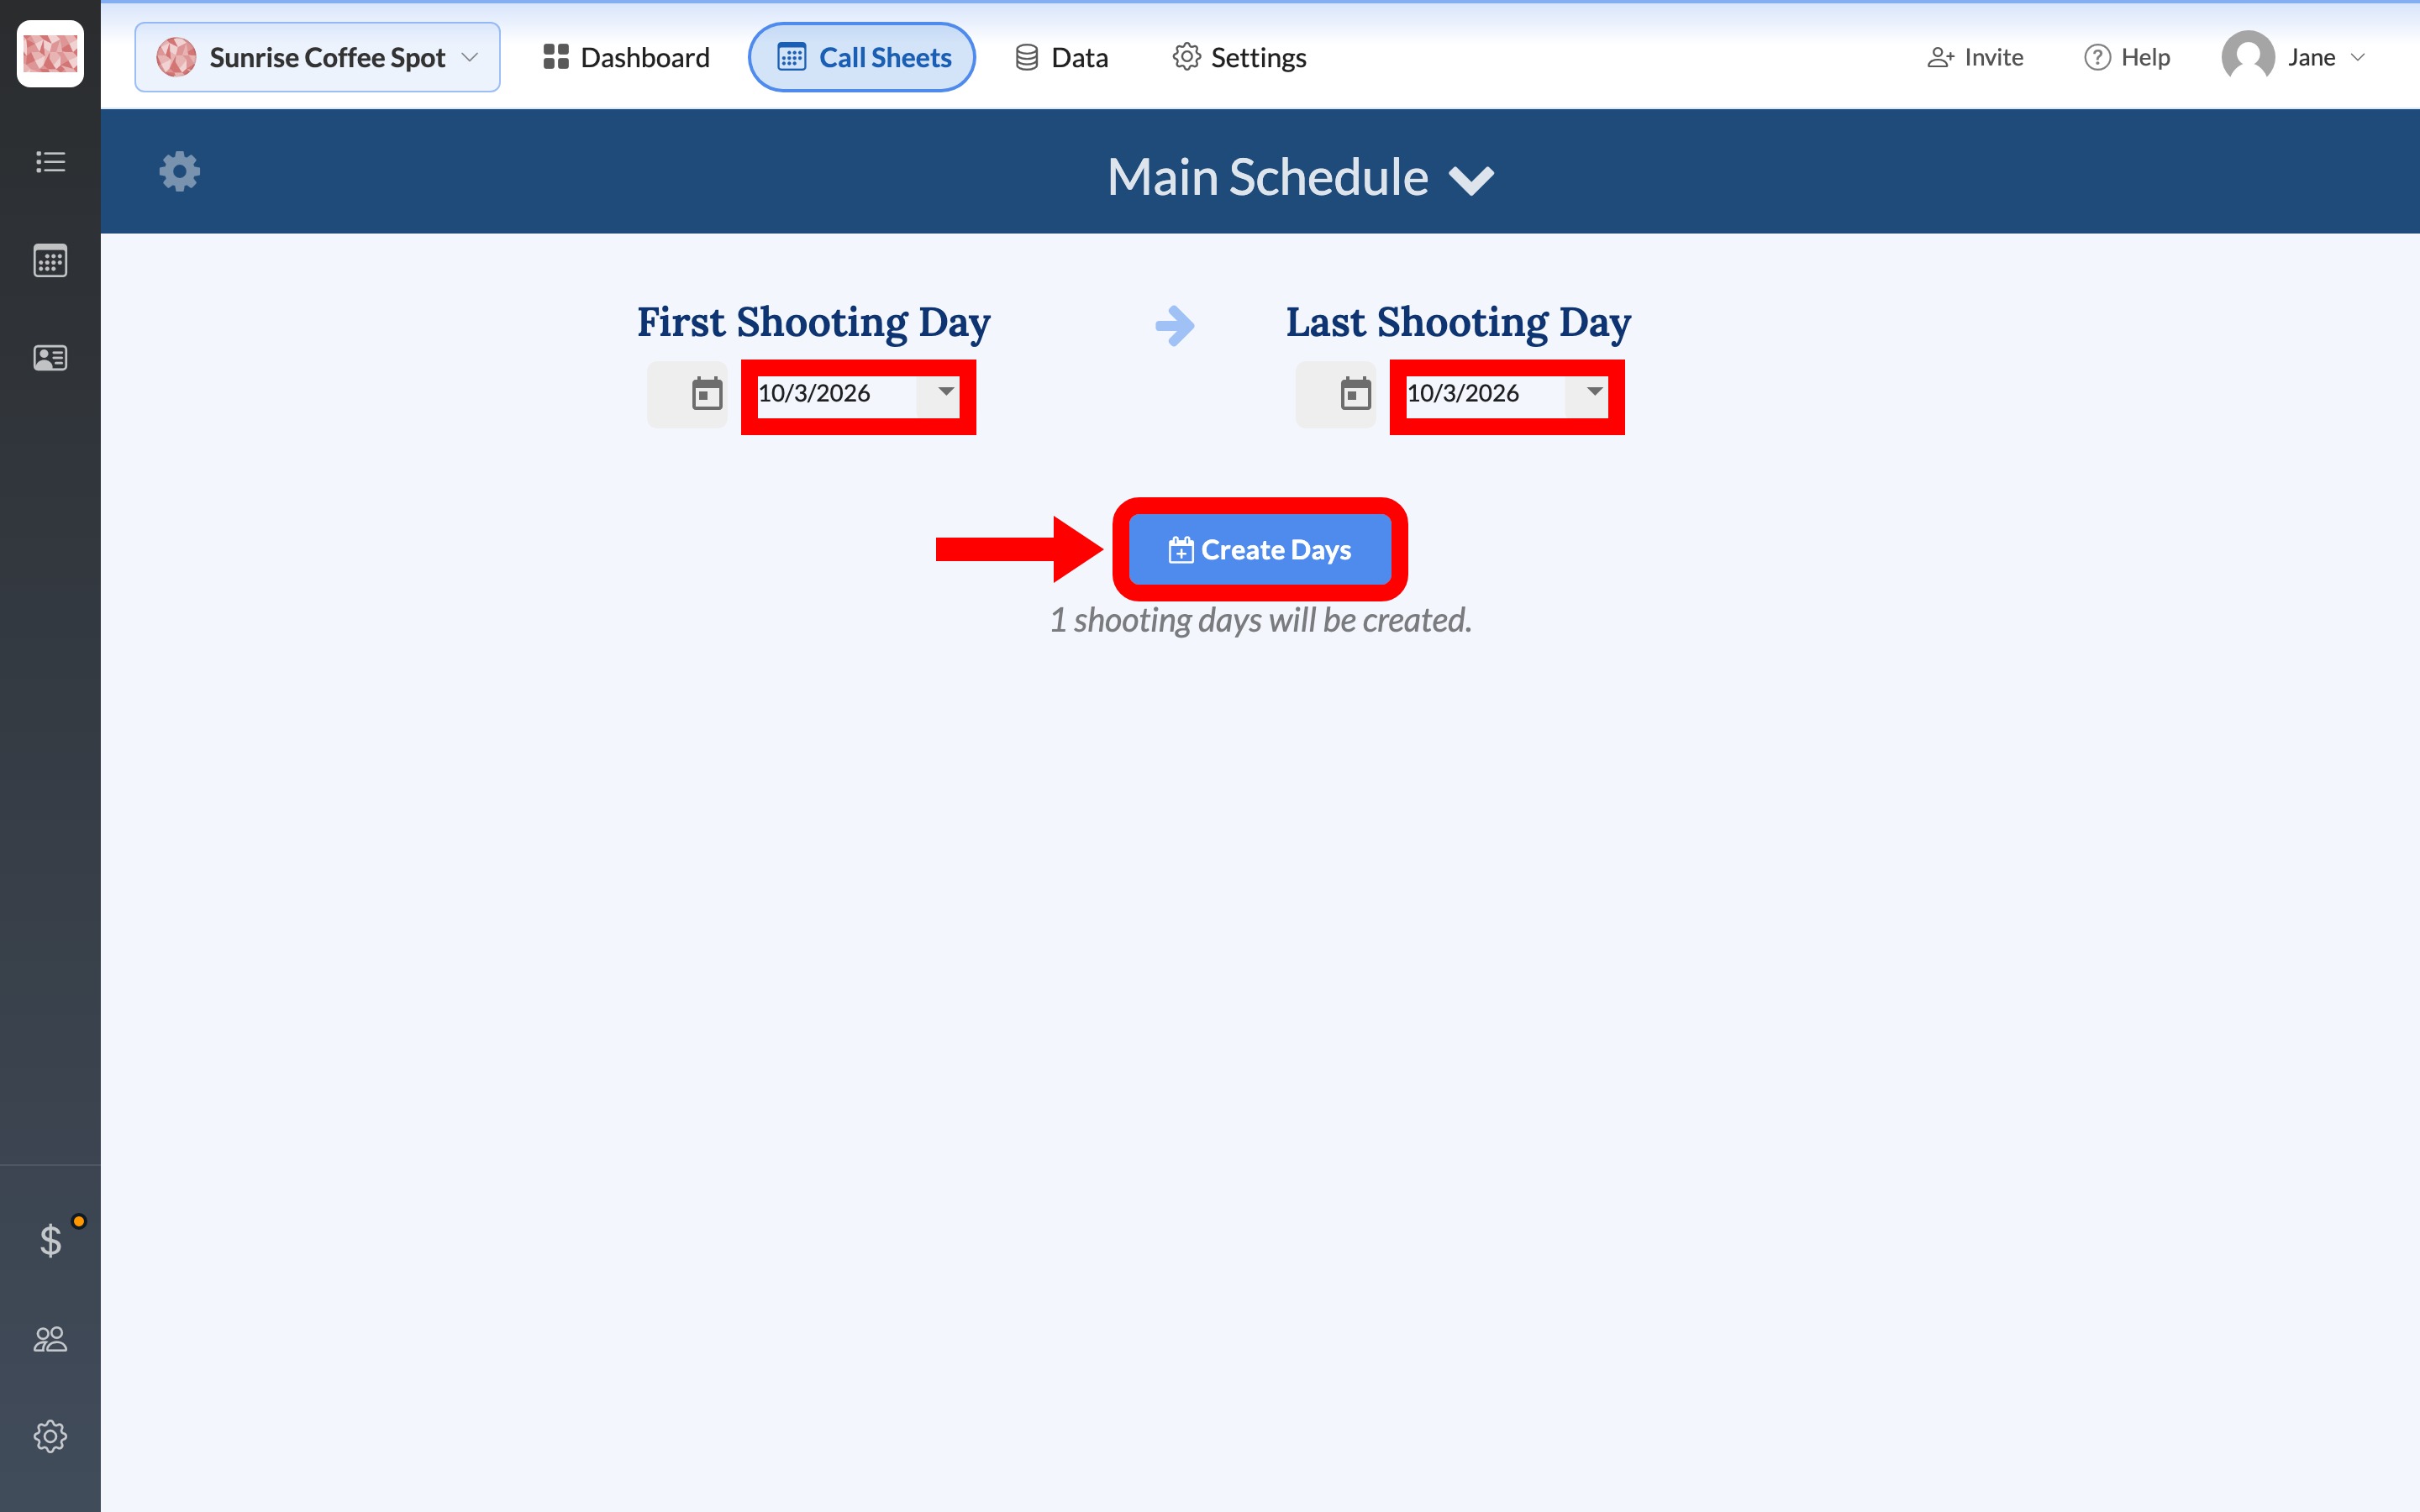
On the new project dashboard, select Call Sheets in the top header. Set both First Shooting Day and Last Shooting Day to the same date and select Create Days. That creates a one-day schedule. For other setups, see Create, rename, or delete schedules.
You can always add, move, or edit dates later.
Open the call sheet
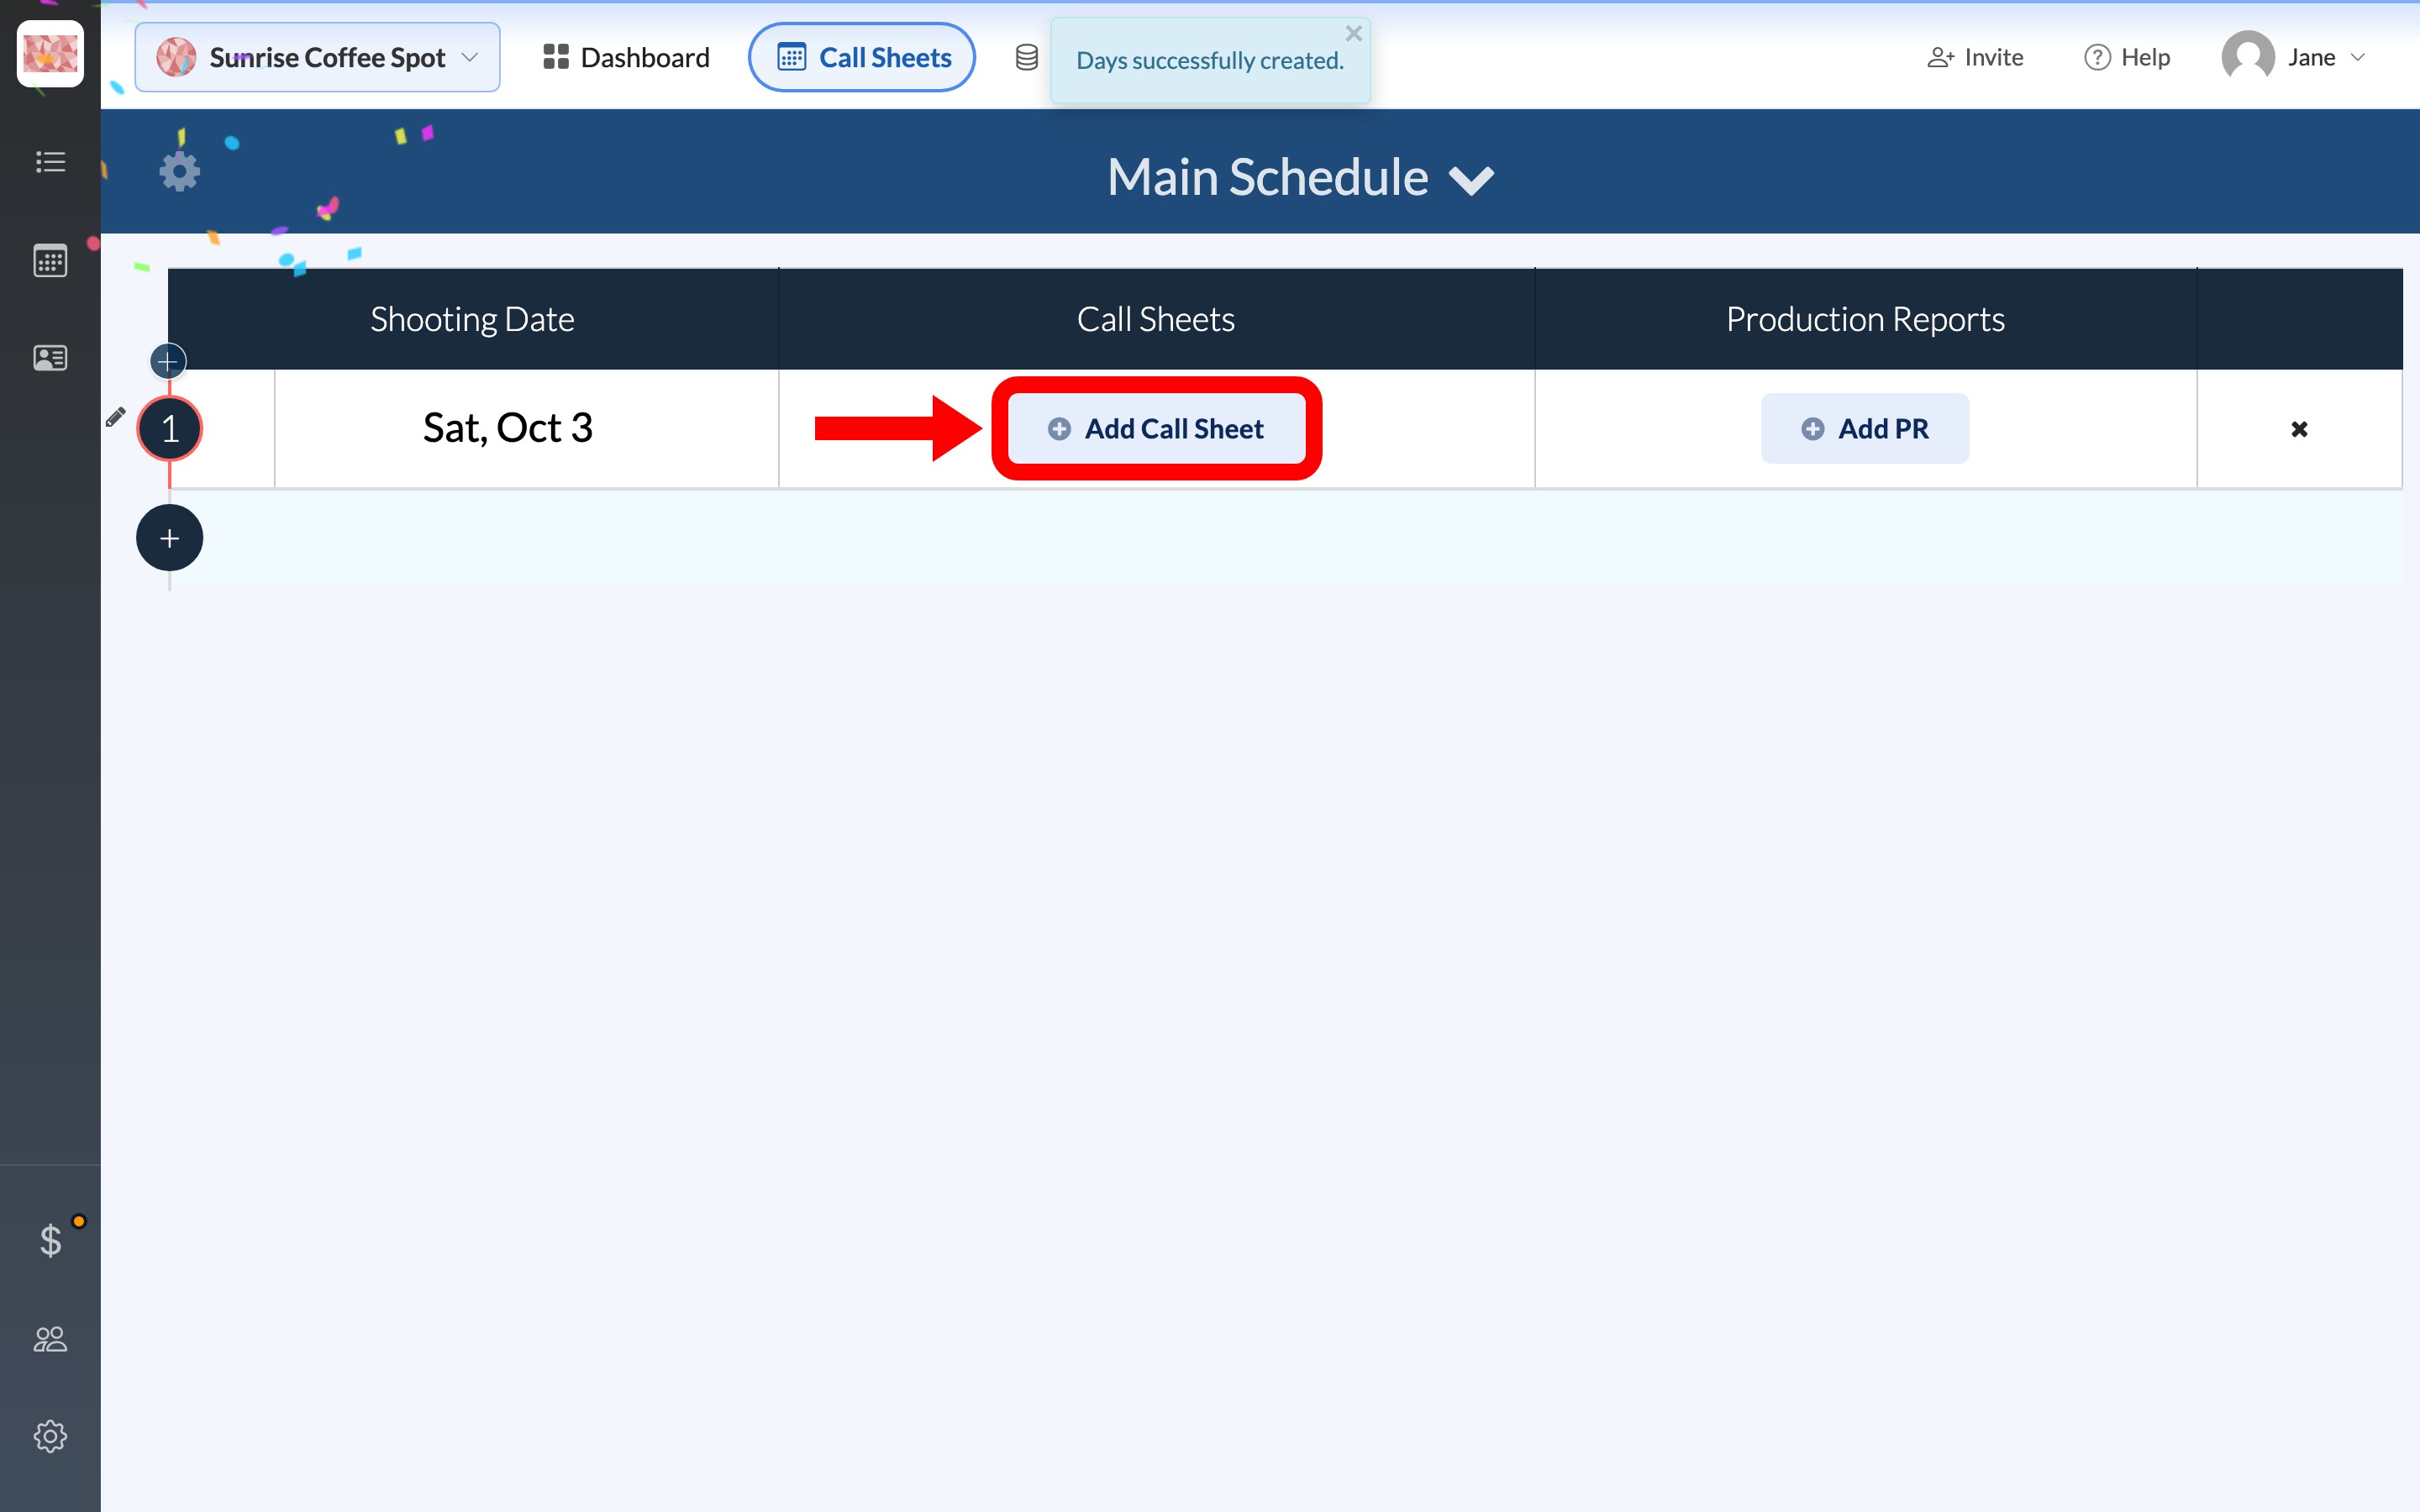
In the new shoot-day row, select Add Call Sheet. SetHero opens the Call Sheet Editor, which saves your changes automatically as you go.
Fill in the day details
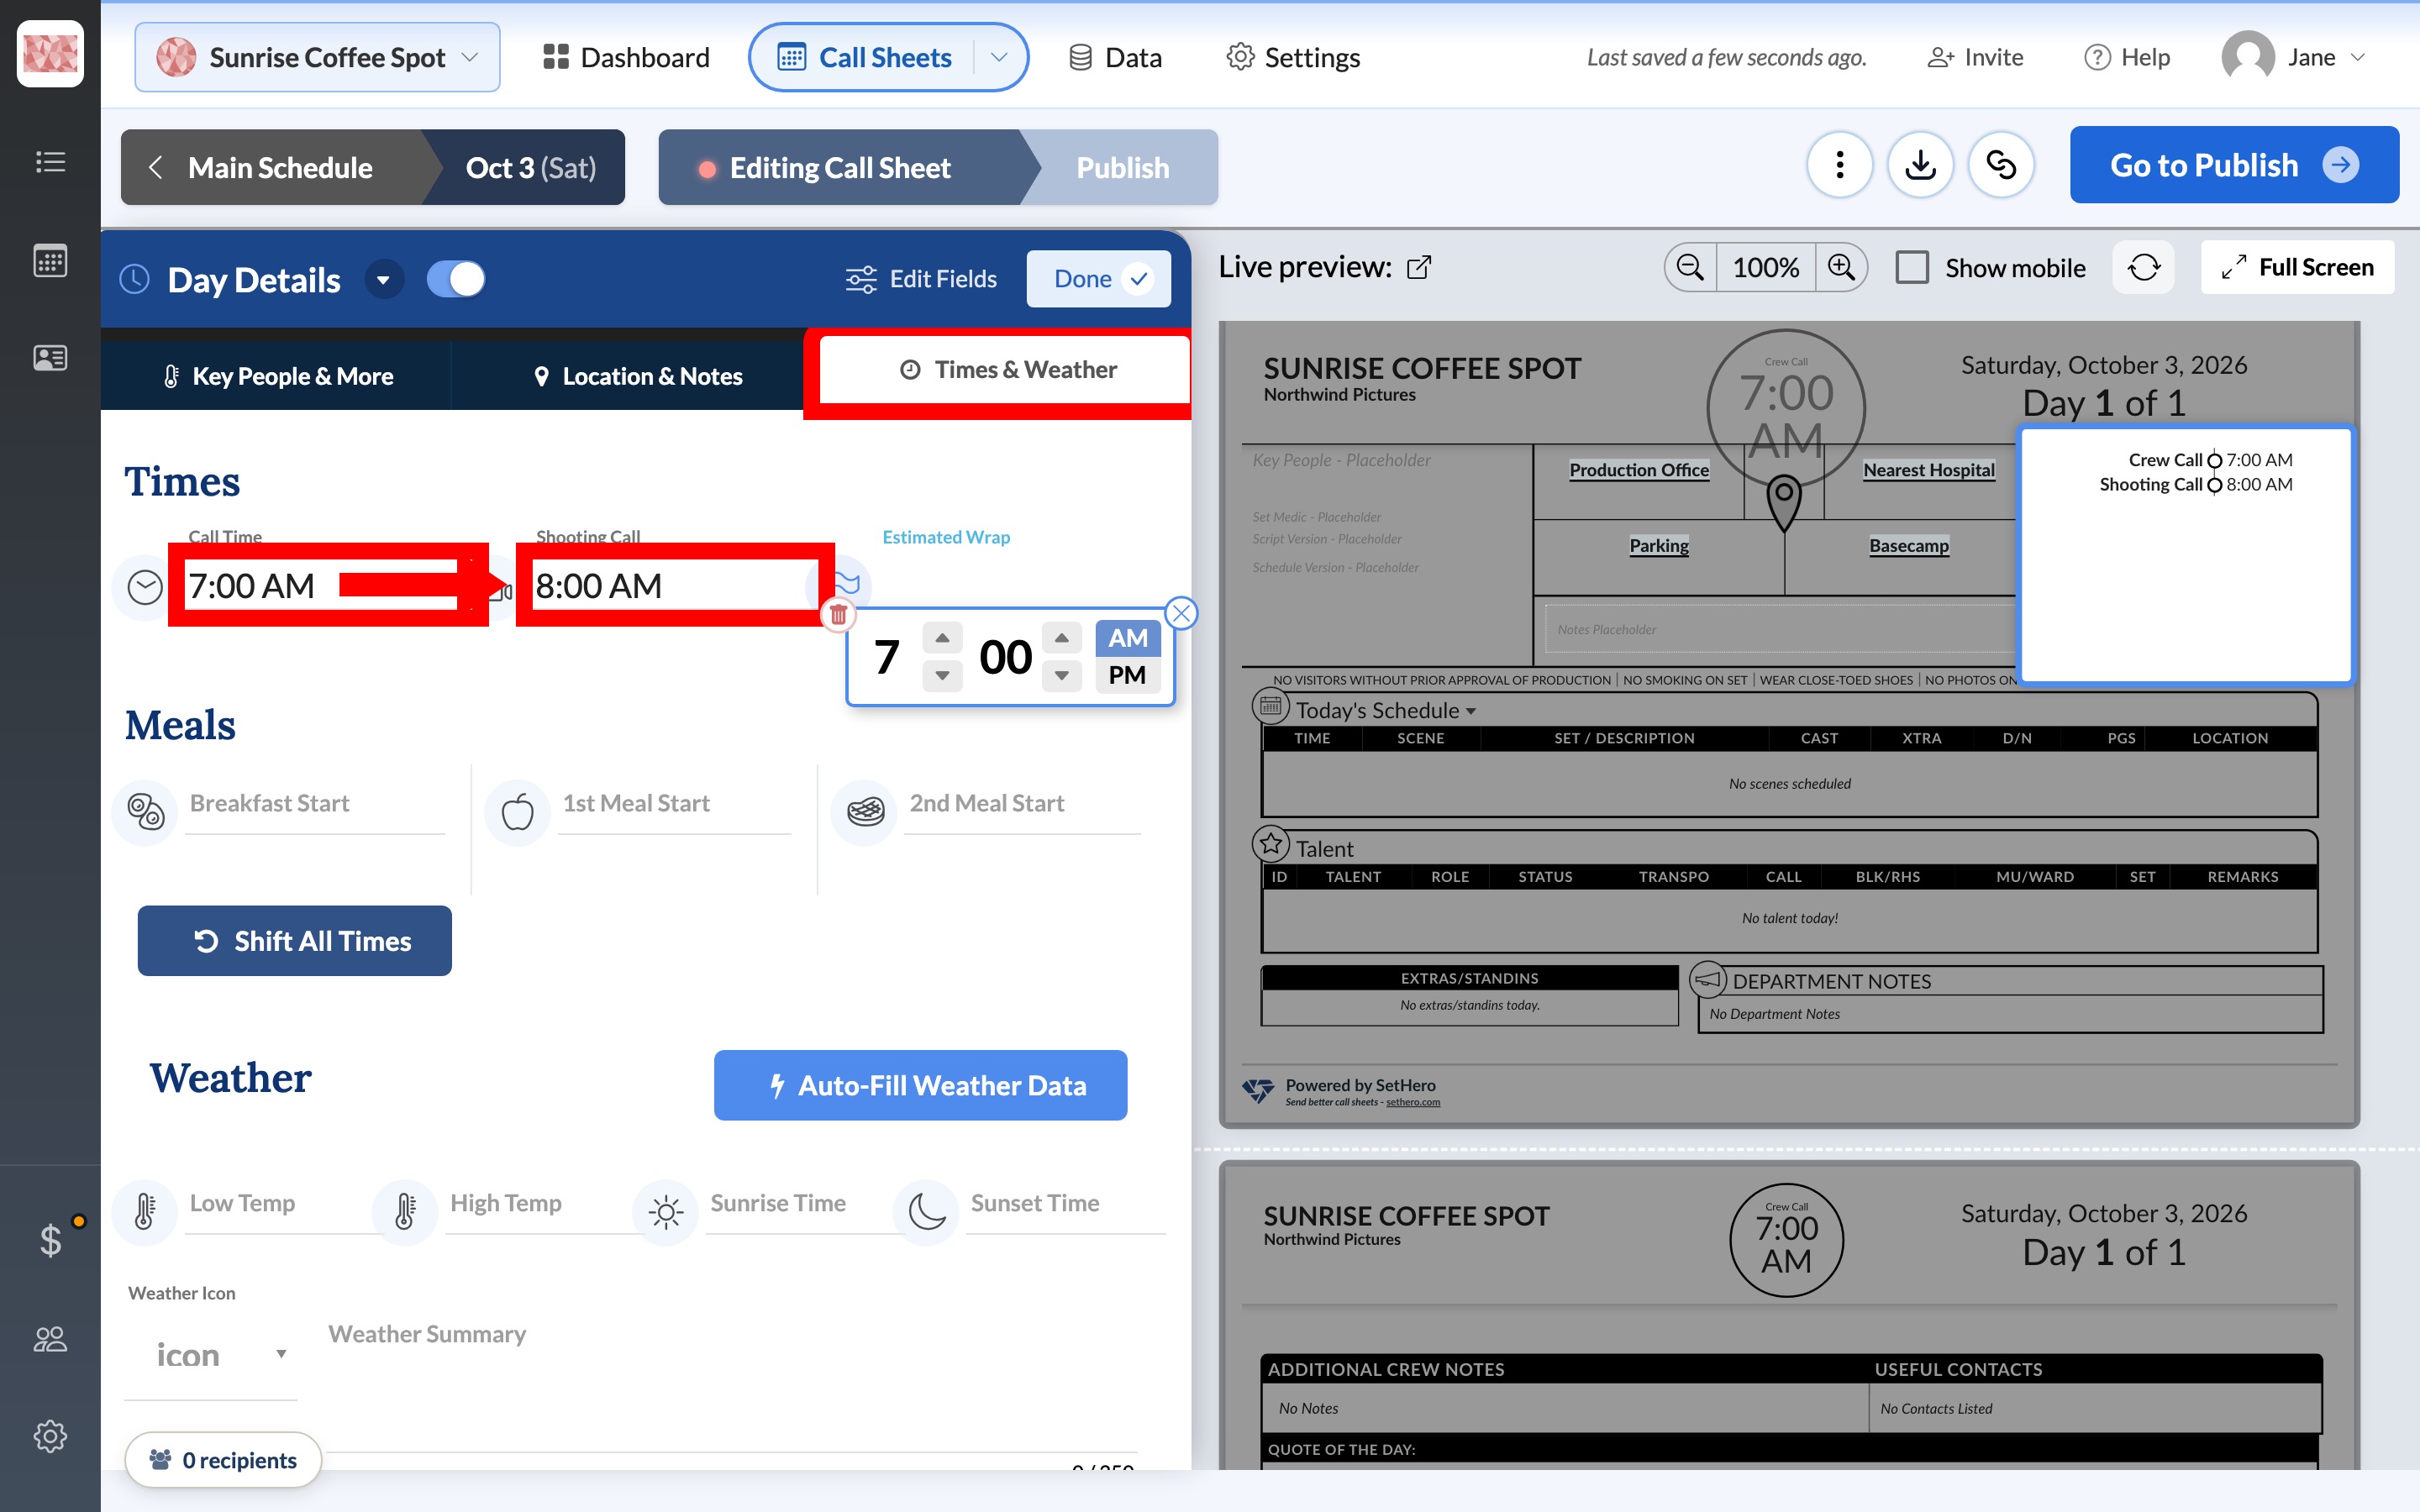
In the Outline, select Edit beside Day Details. Set Call Time to the general crew arrival and Shooting Call to the planned start of filming. Those two are enough for a first sheet. Add Estimated Wrap only if you already know it. See Setting the call time, shoot time, and wrap time for the details, or Add weather and sunrise/sunset times when you're ready to add a forecast.
Next, select Location & Notes. Rename the Production Office row to Shoot Location, then select Add Location and enter the location's name and address. In Main Notes, add one short parking instruction.
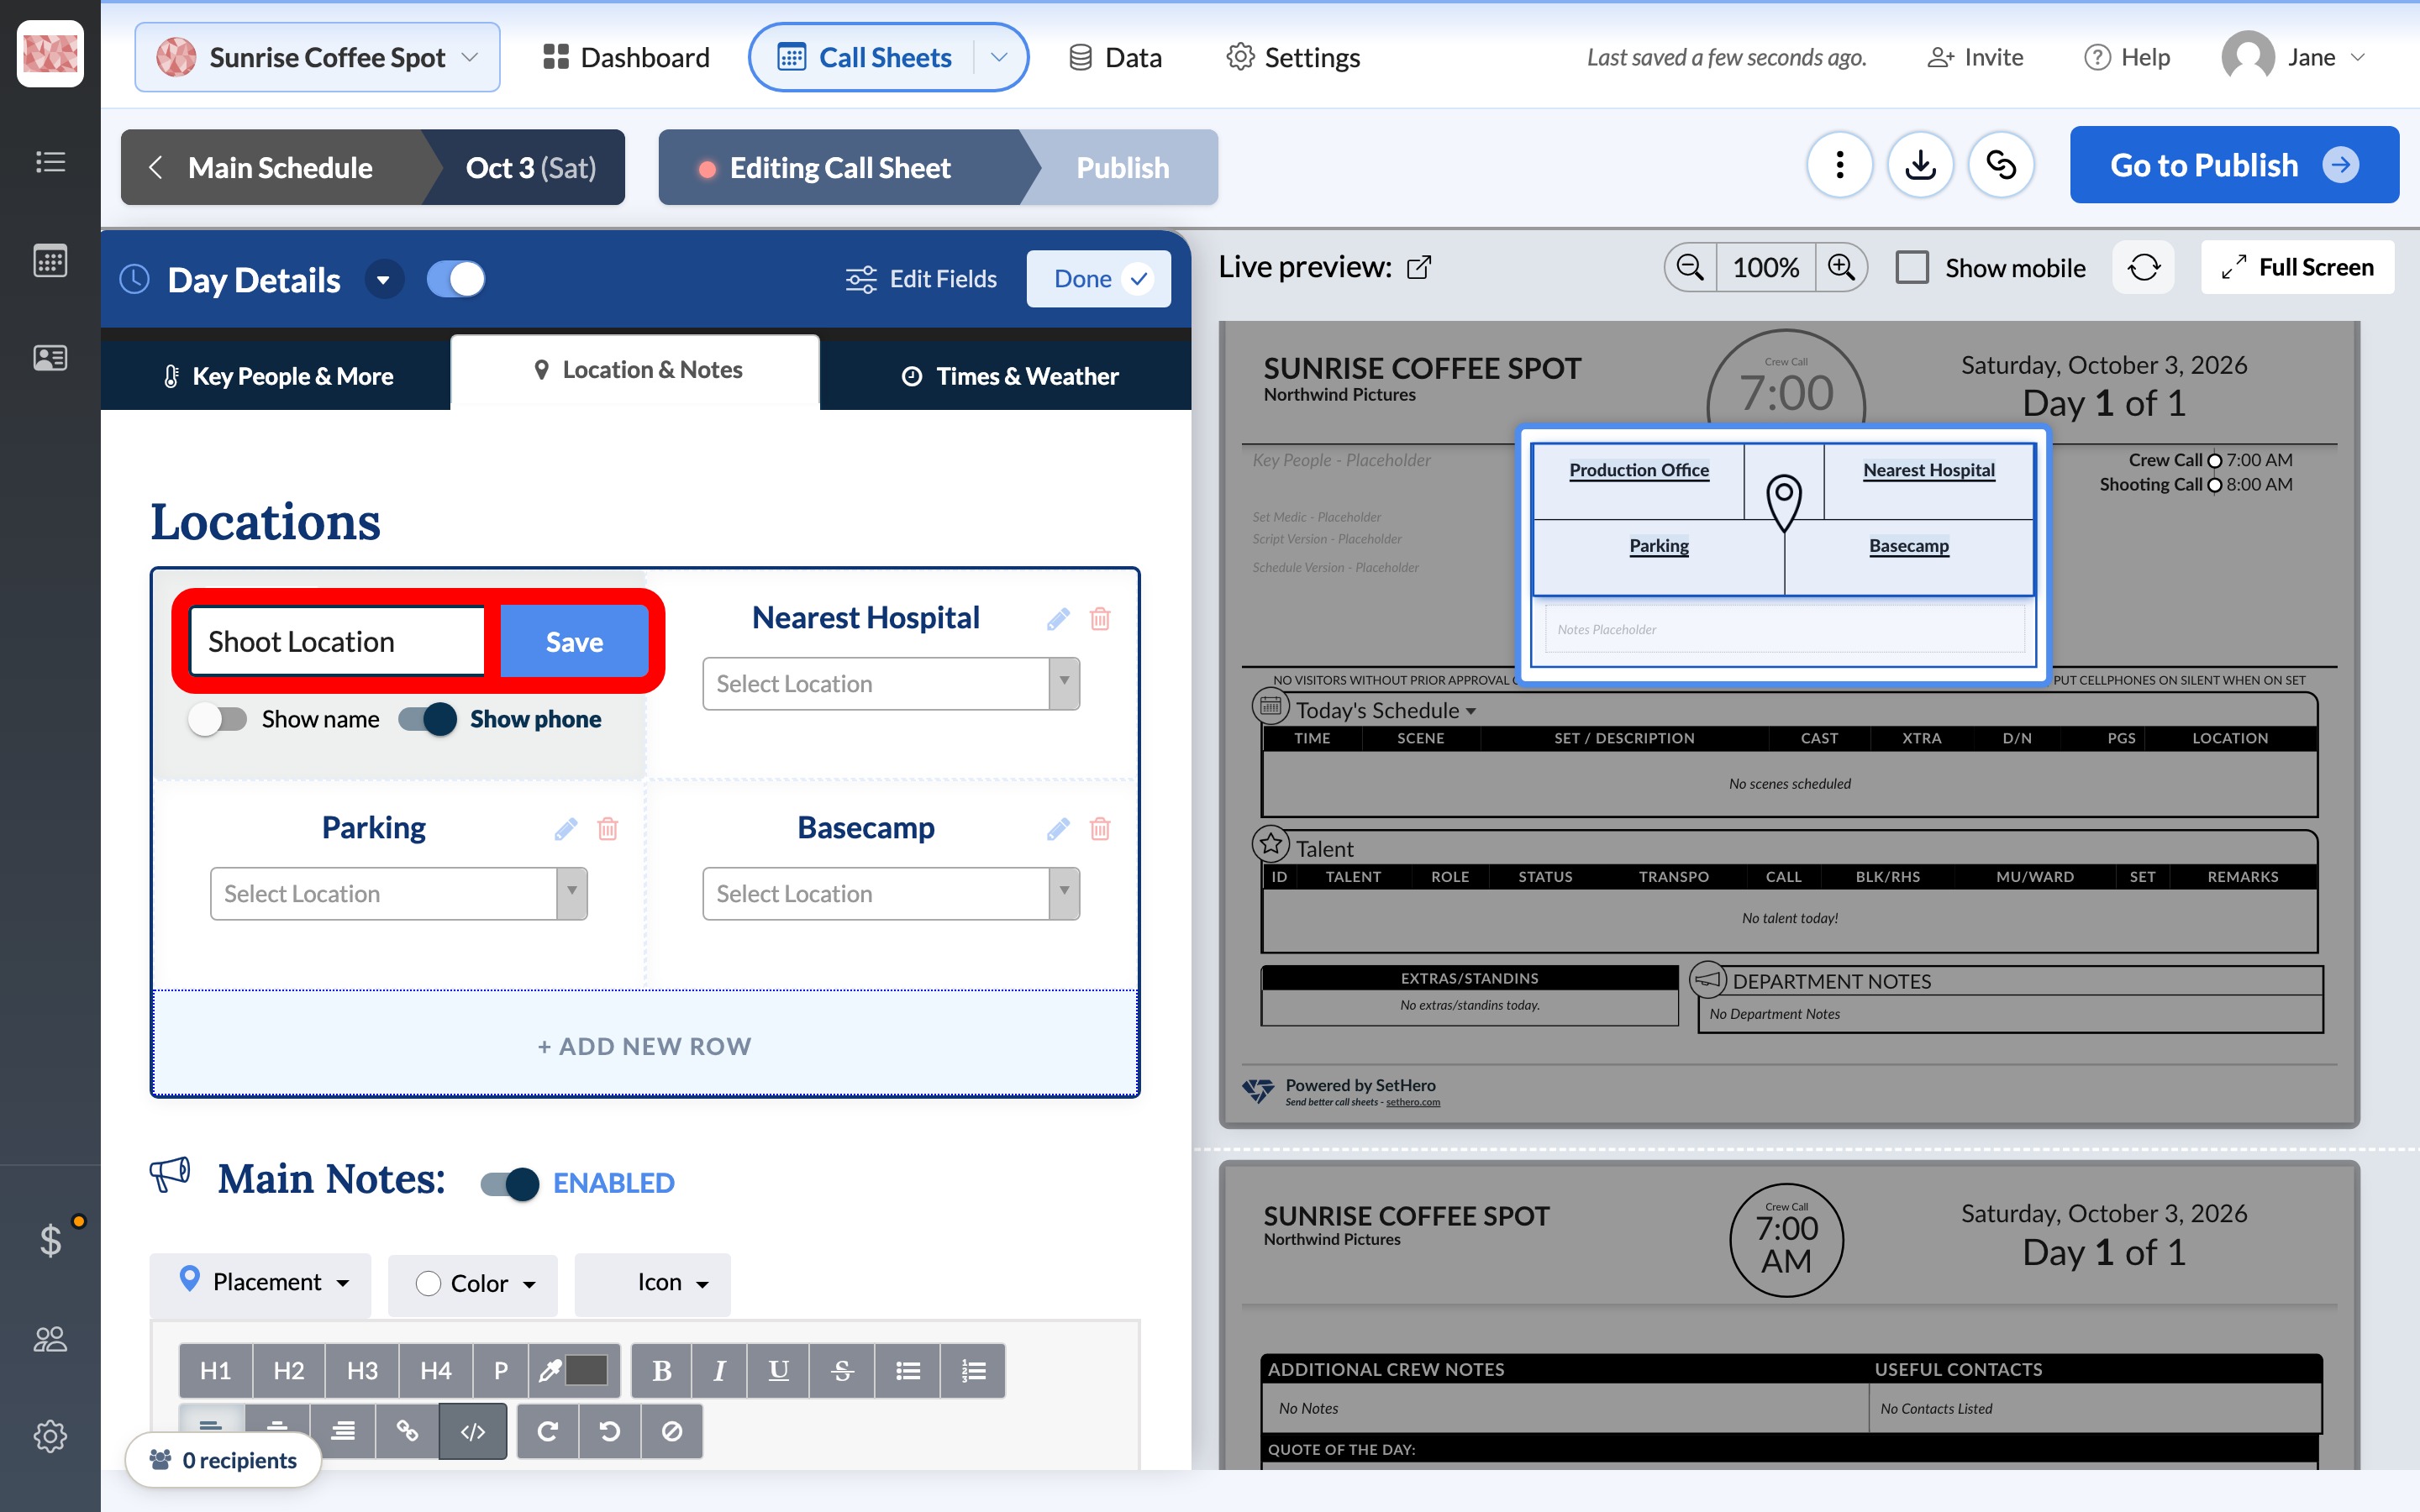
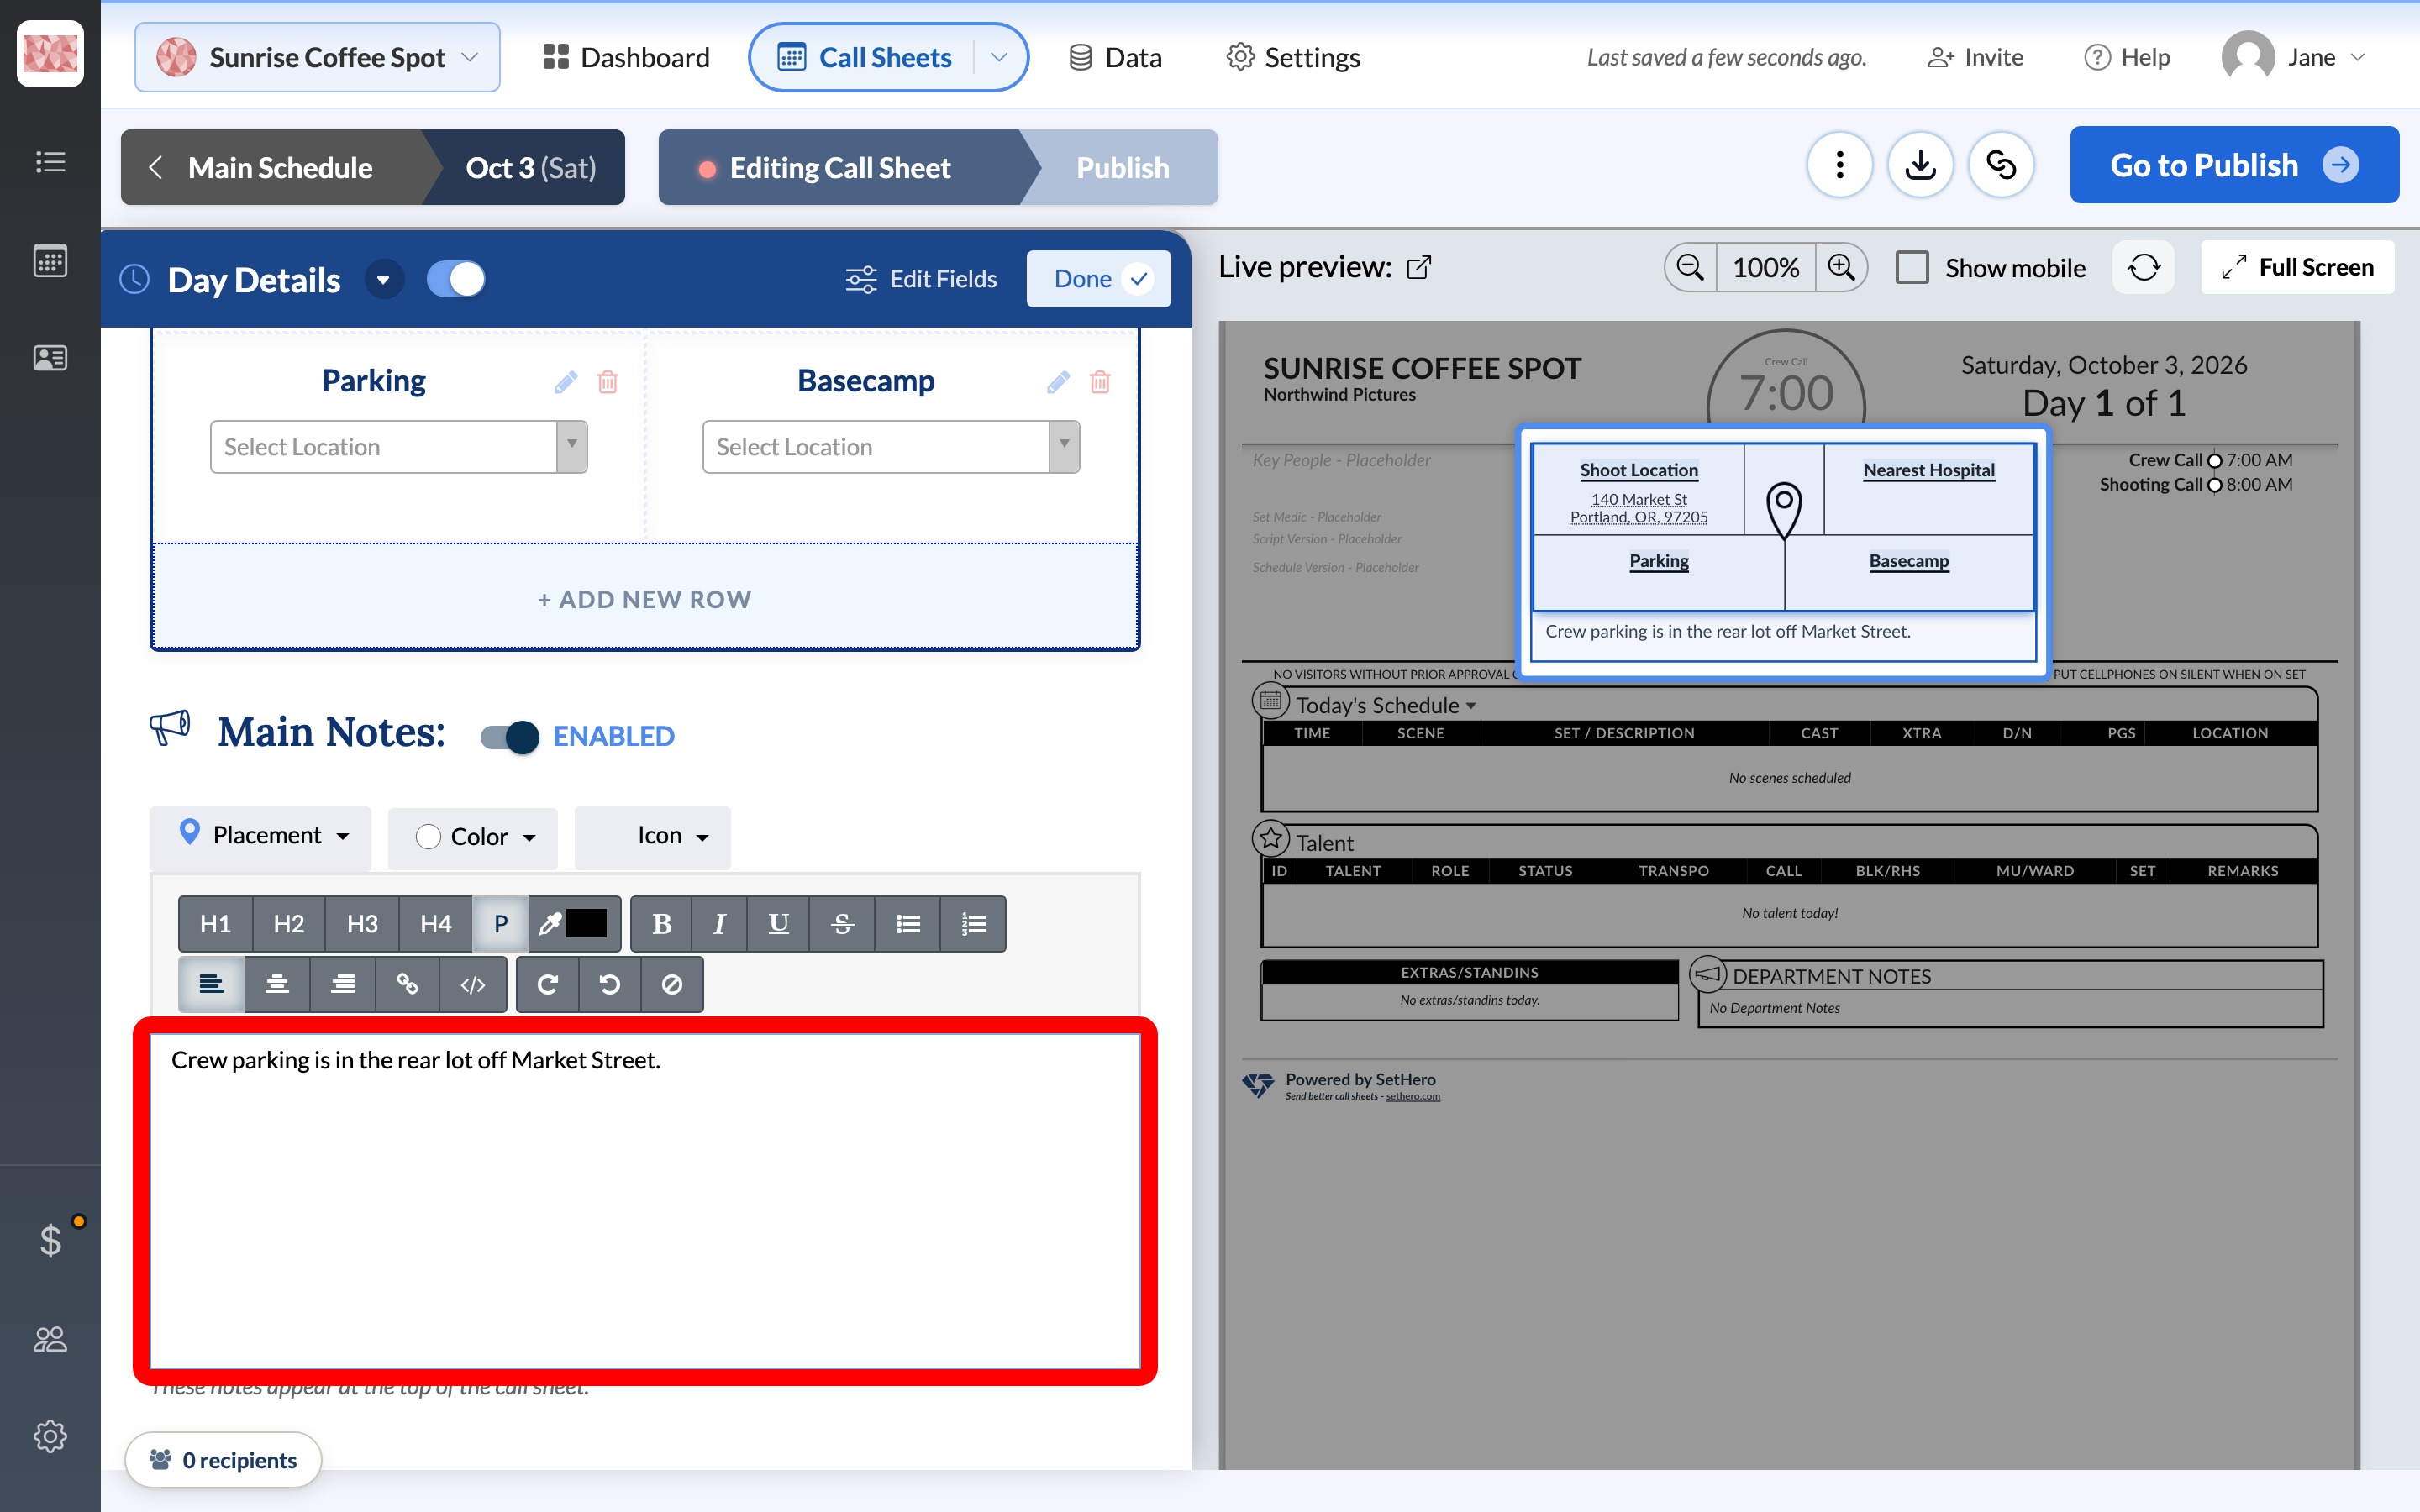
Don't worry about Nearest Hospital or a separate Parking location yet. Locations, parking, and the nearest hospital covers those when you have the details.
Add crew and set call times
Select Done to return to the Outline, then select Edit beside Crew. Select WANNA ADD ONE? to add your first crew member: enter their full name, email, and position, then select Create. Add more people the same way with Add Crew.
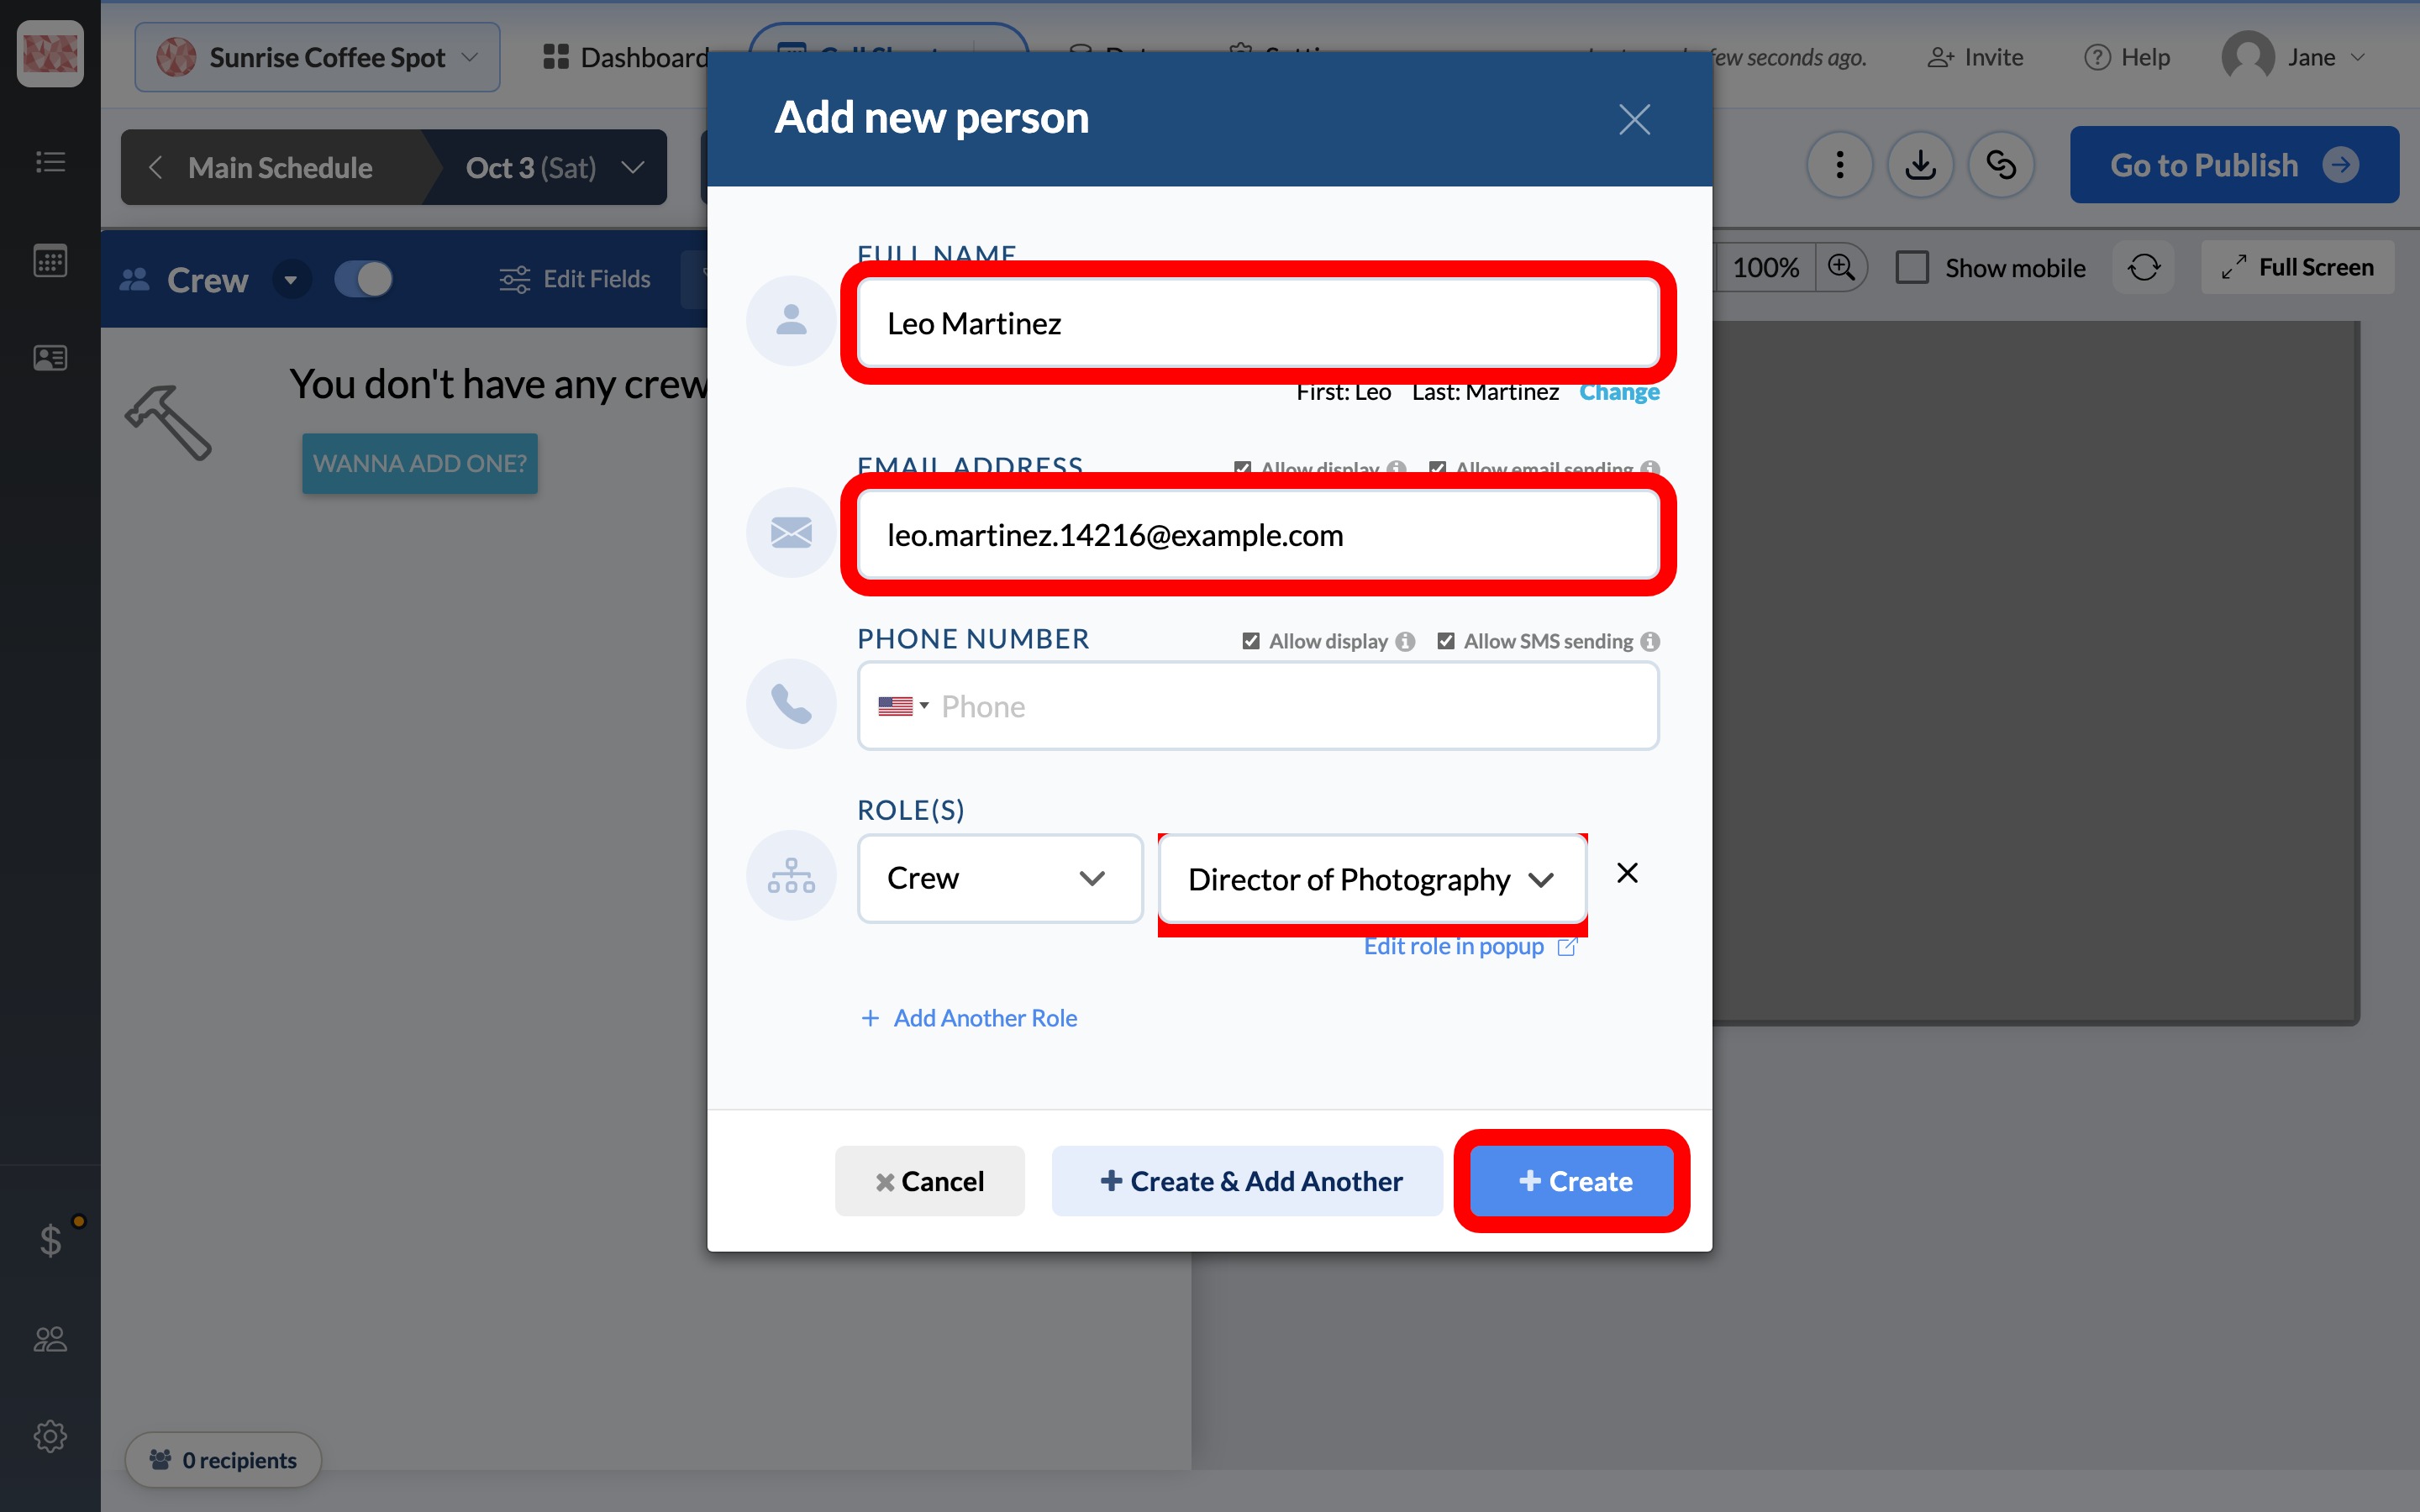
Adding crew here also adds them to the project's People list, so there's no need to visit Data → People.
Select each crew member's displayed call time and choose their arrival time. Give each person a specific time, even when it matches the general call.
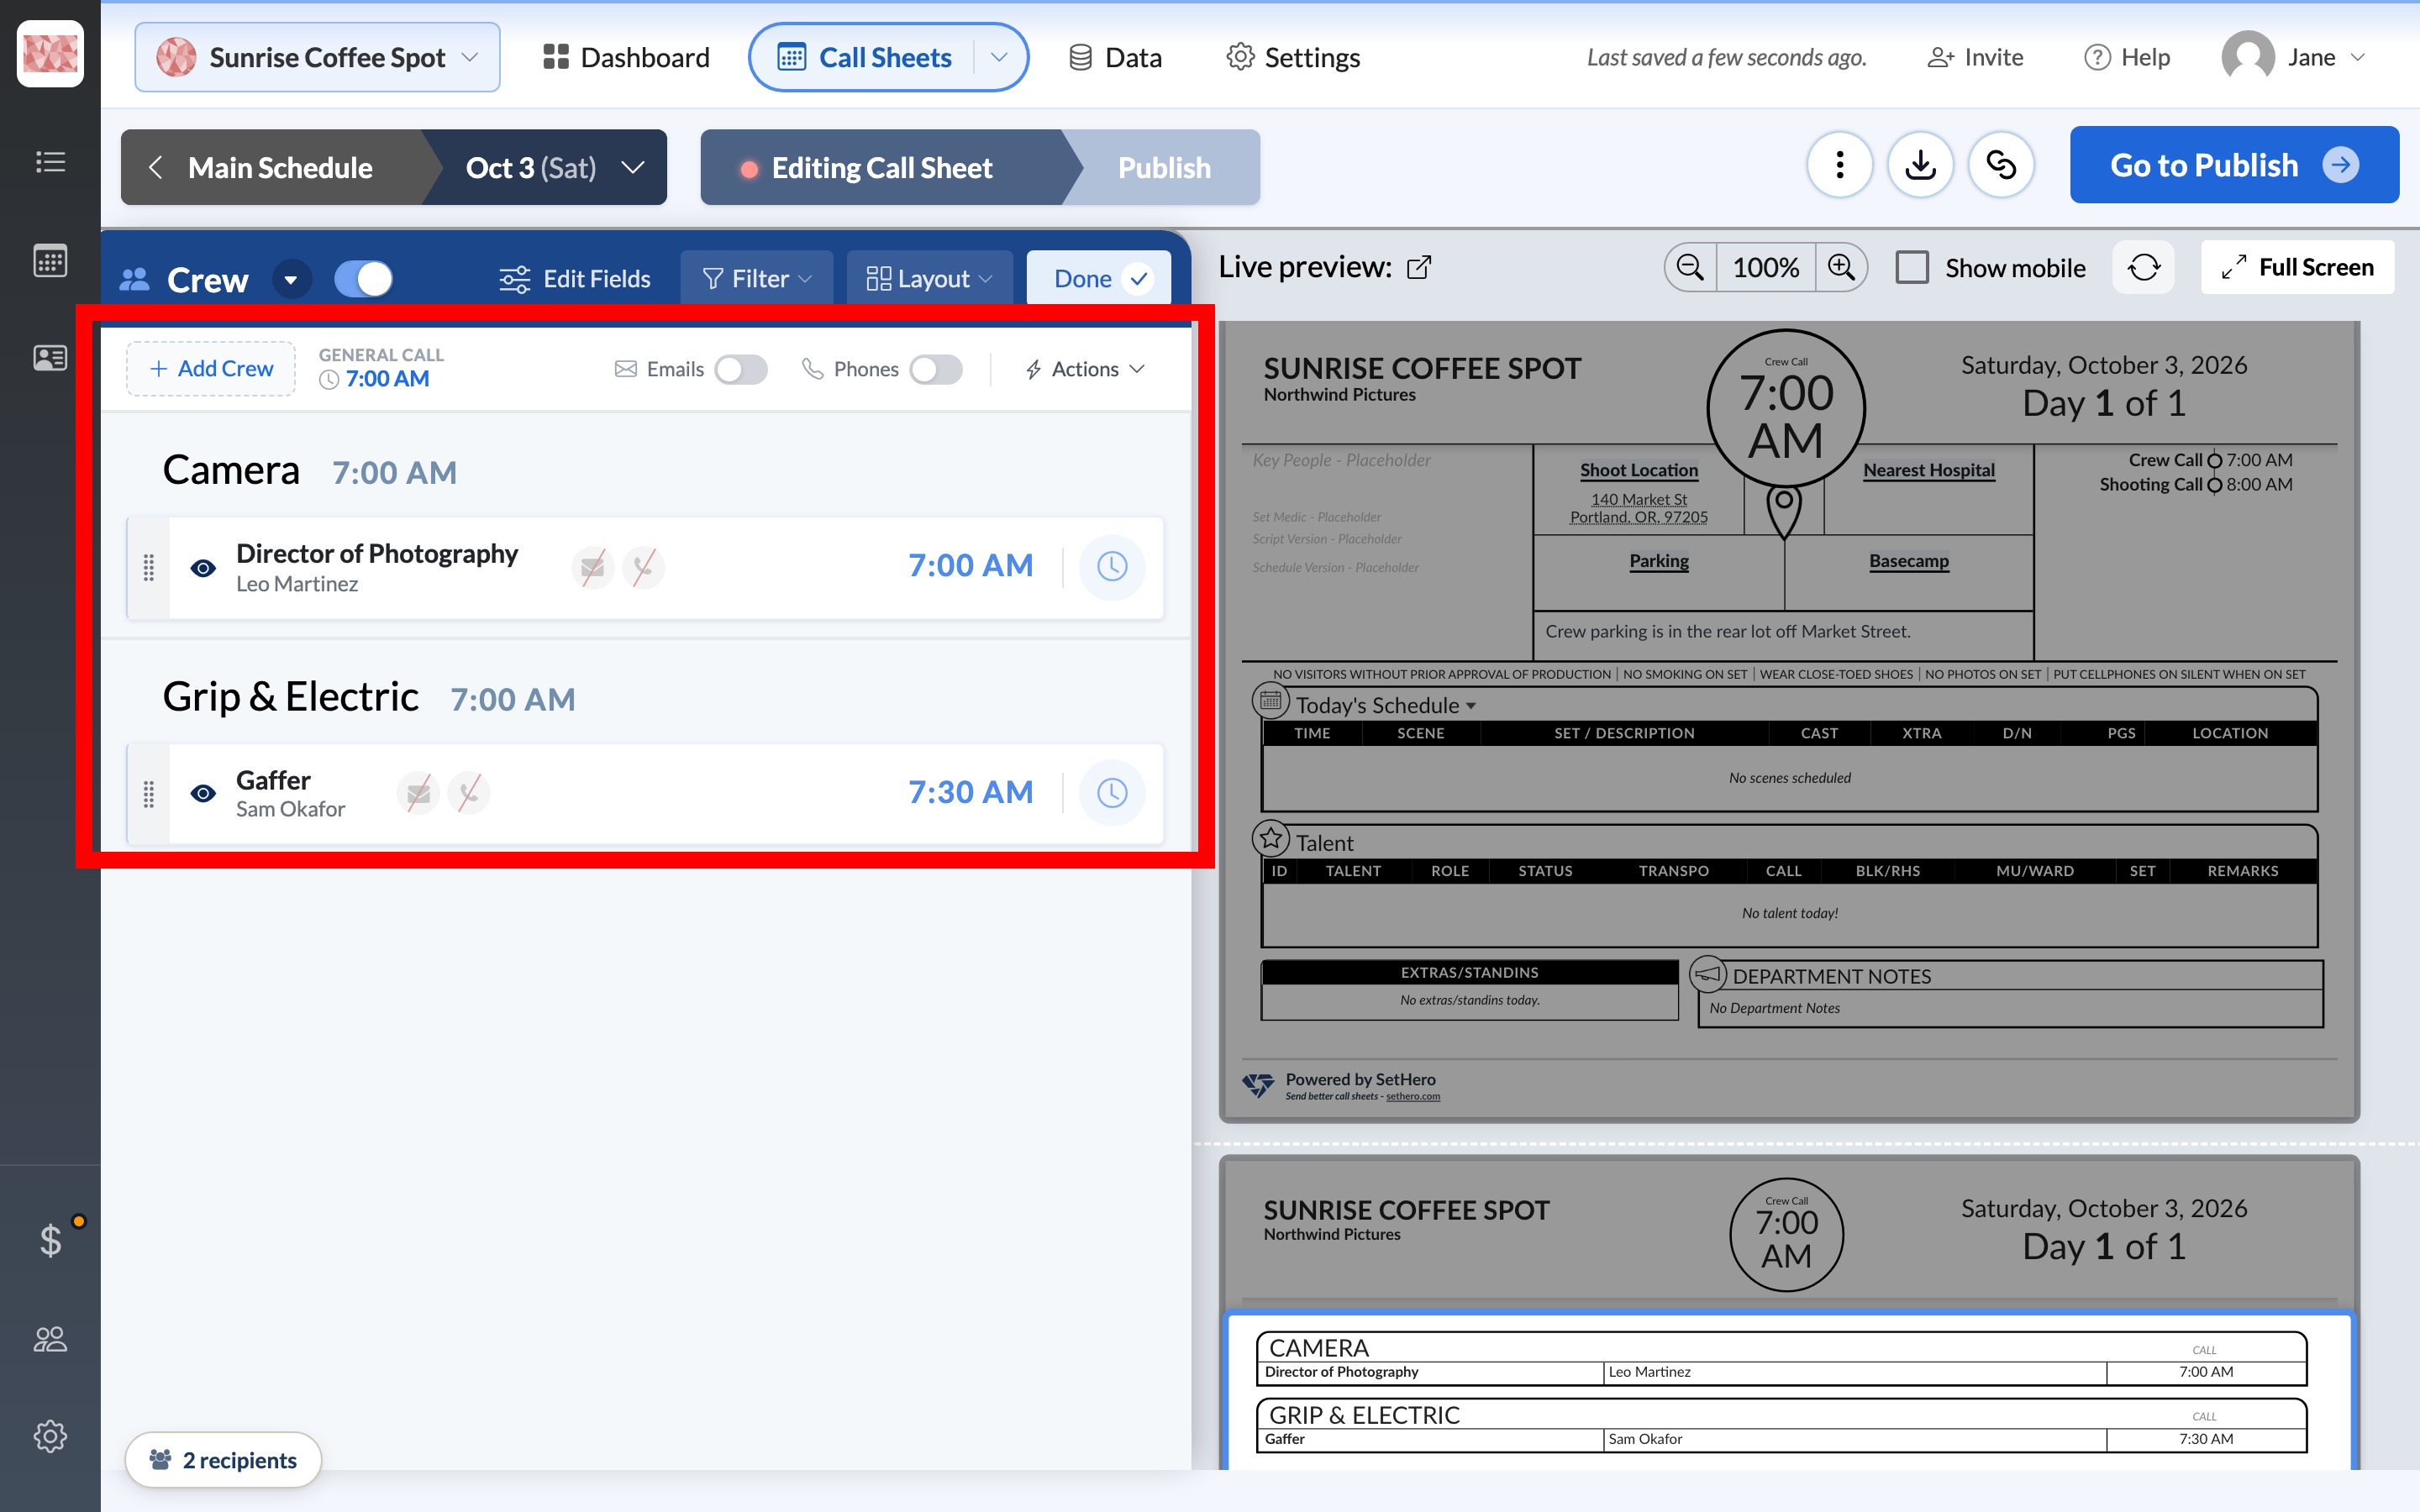
For more options, see Set crew call times for individuals, departments, and the whole unit. For a larger production, prepare the whole team first with Build your crew list.
Preview and publish
Select Done, then check the live preview on the right: project name, date, crew call times, location, and parking note. If anything's off, jump back to that section in the Outline.
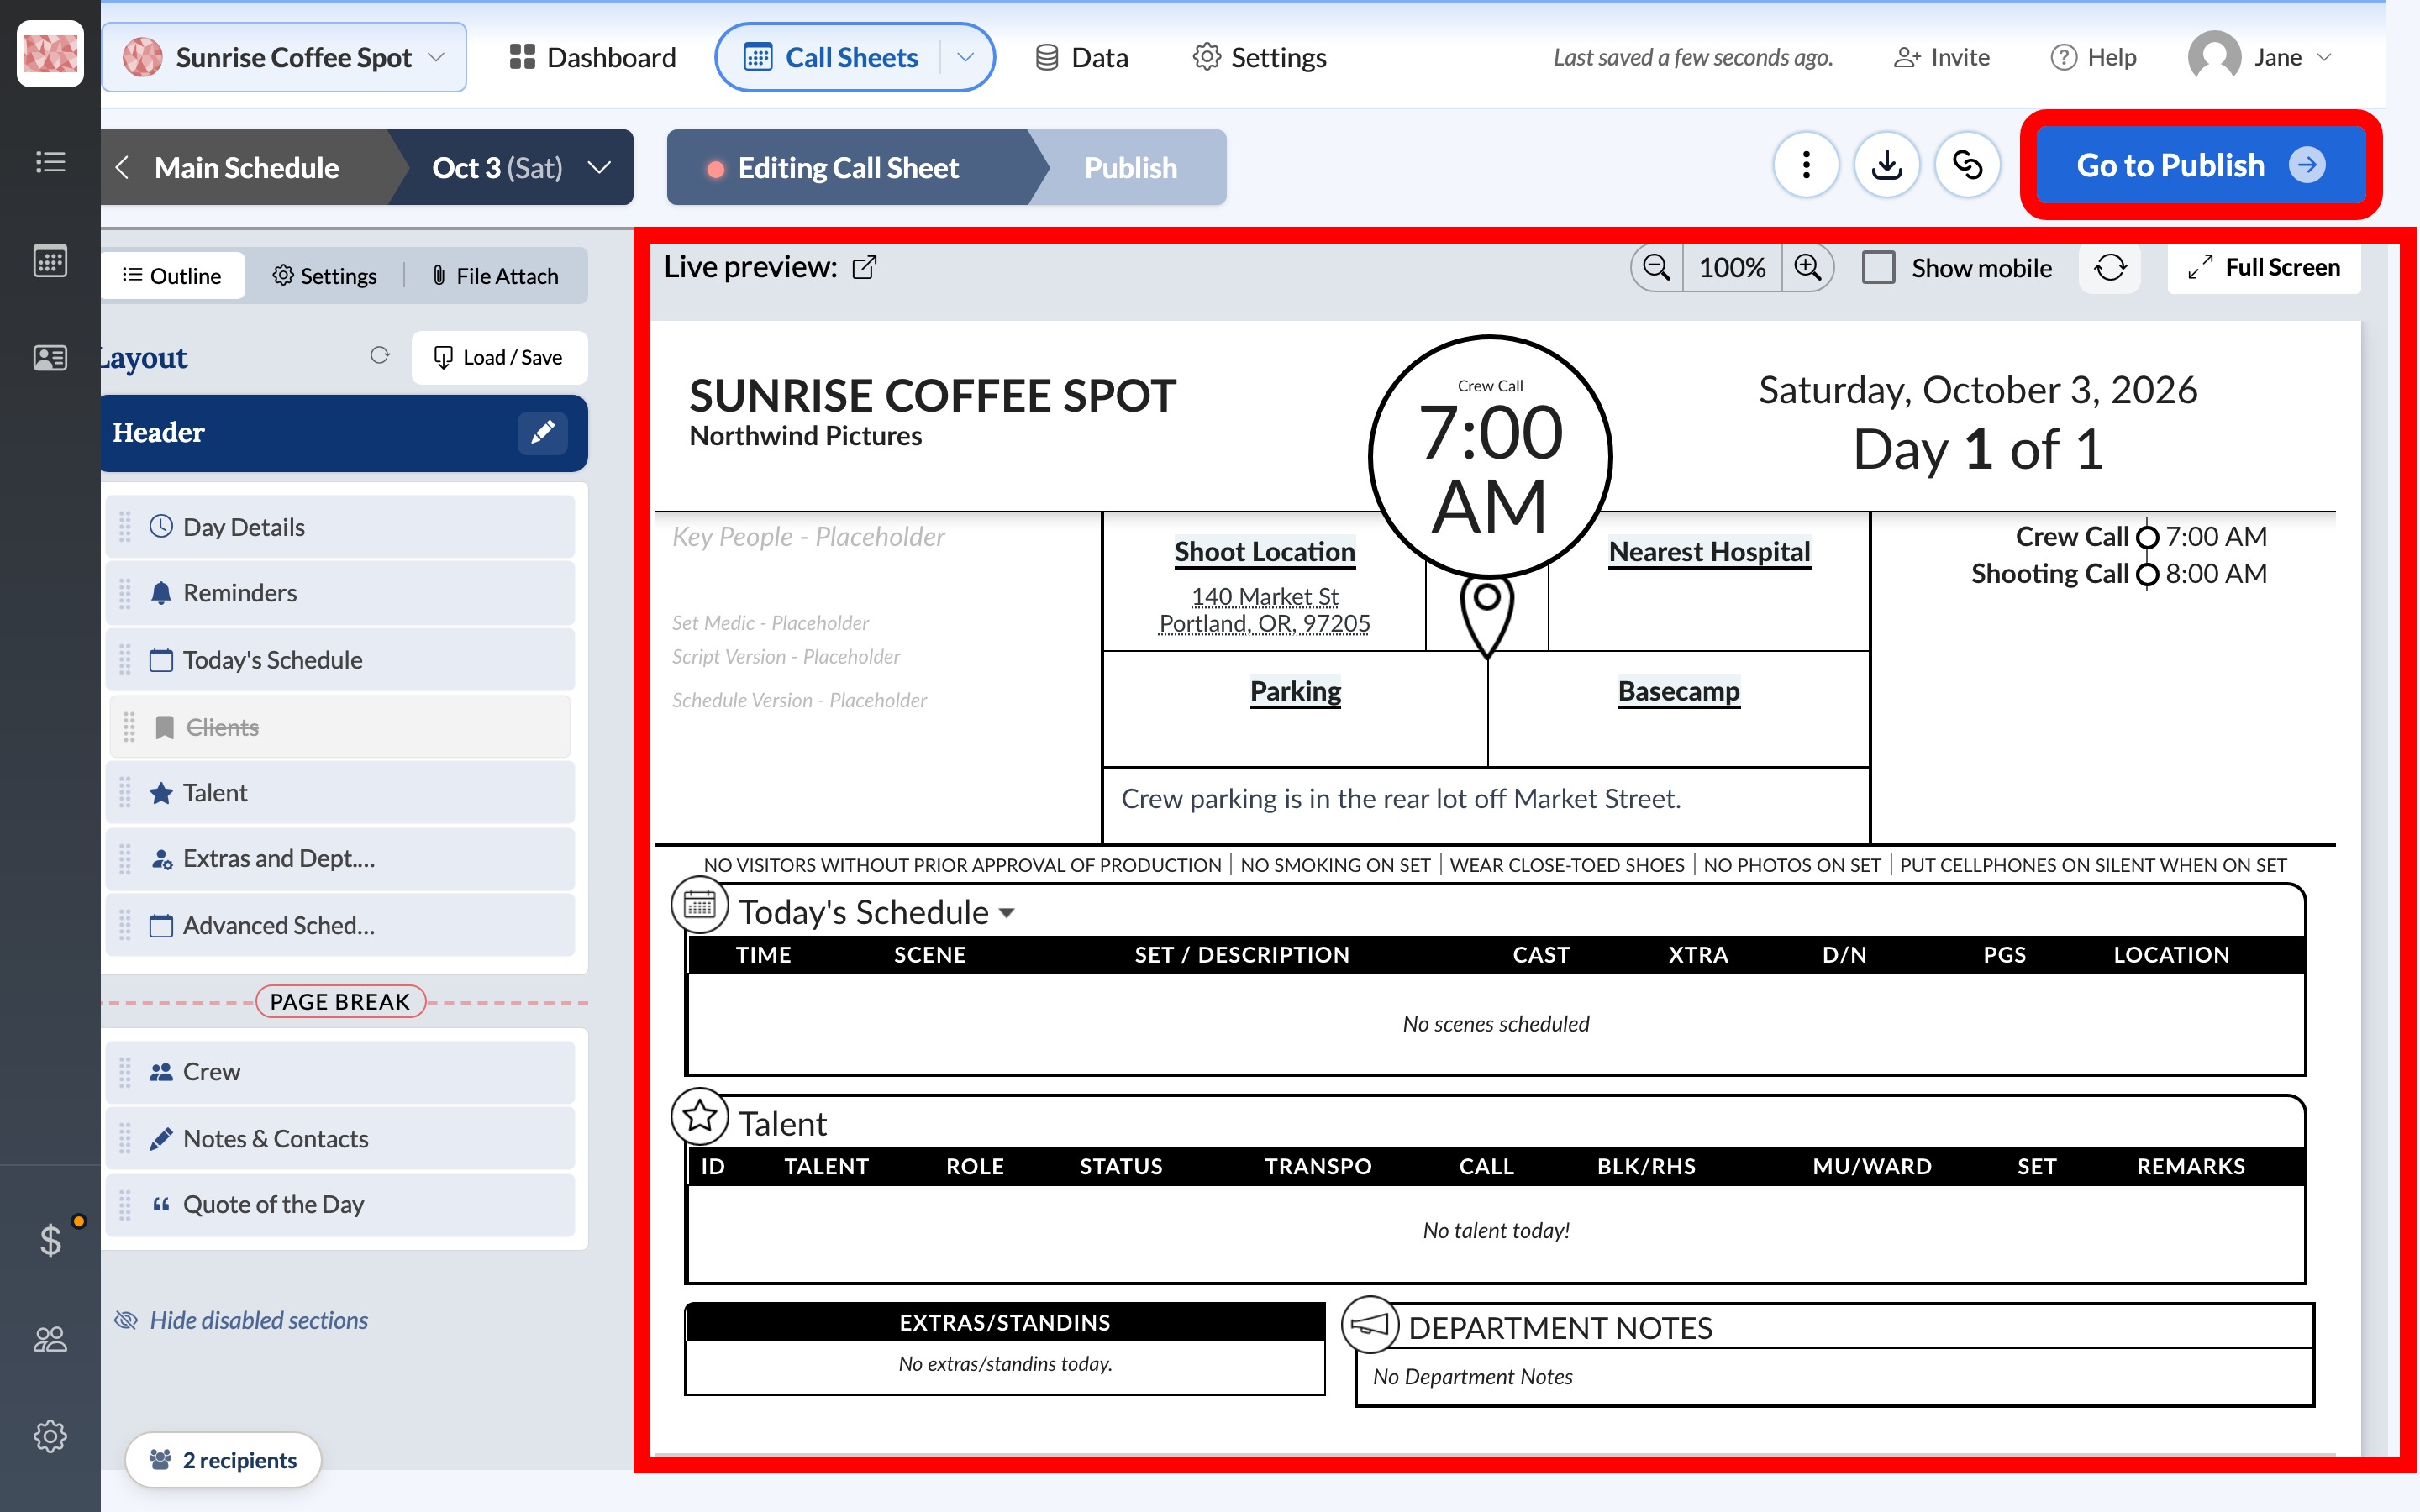
Select Go to Publish. Choose Everyone on the sheet to include all your crew, then review the Email Preview and SMS Preview on the right.
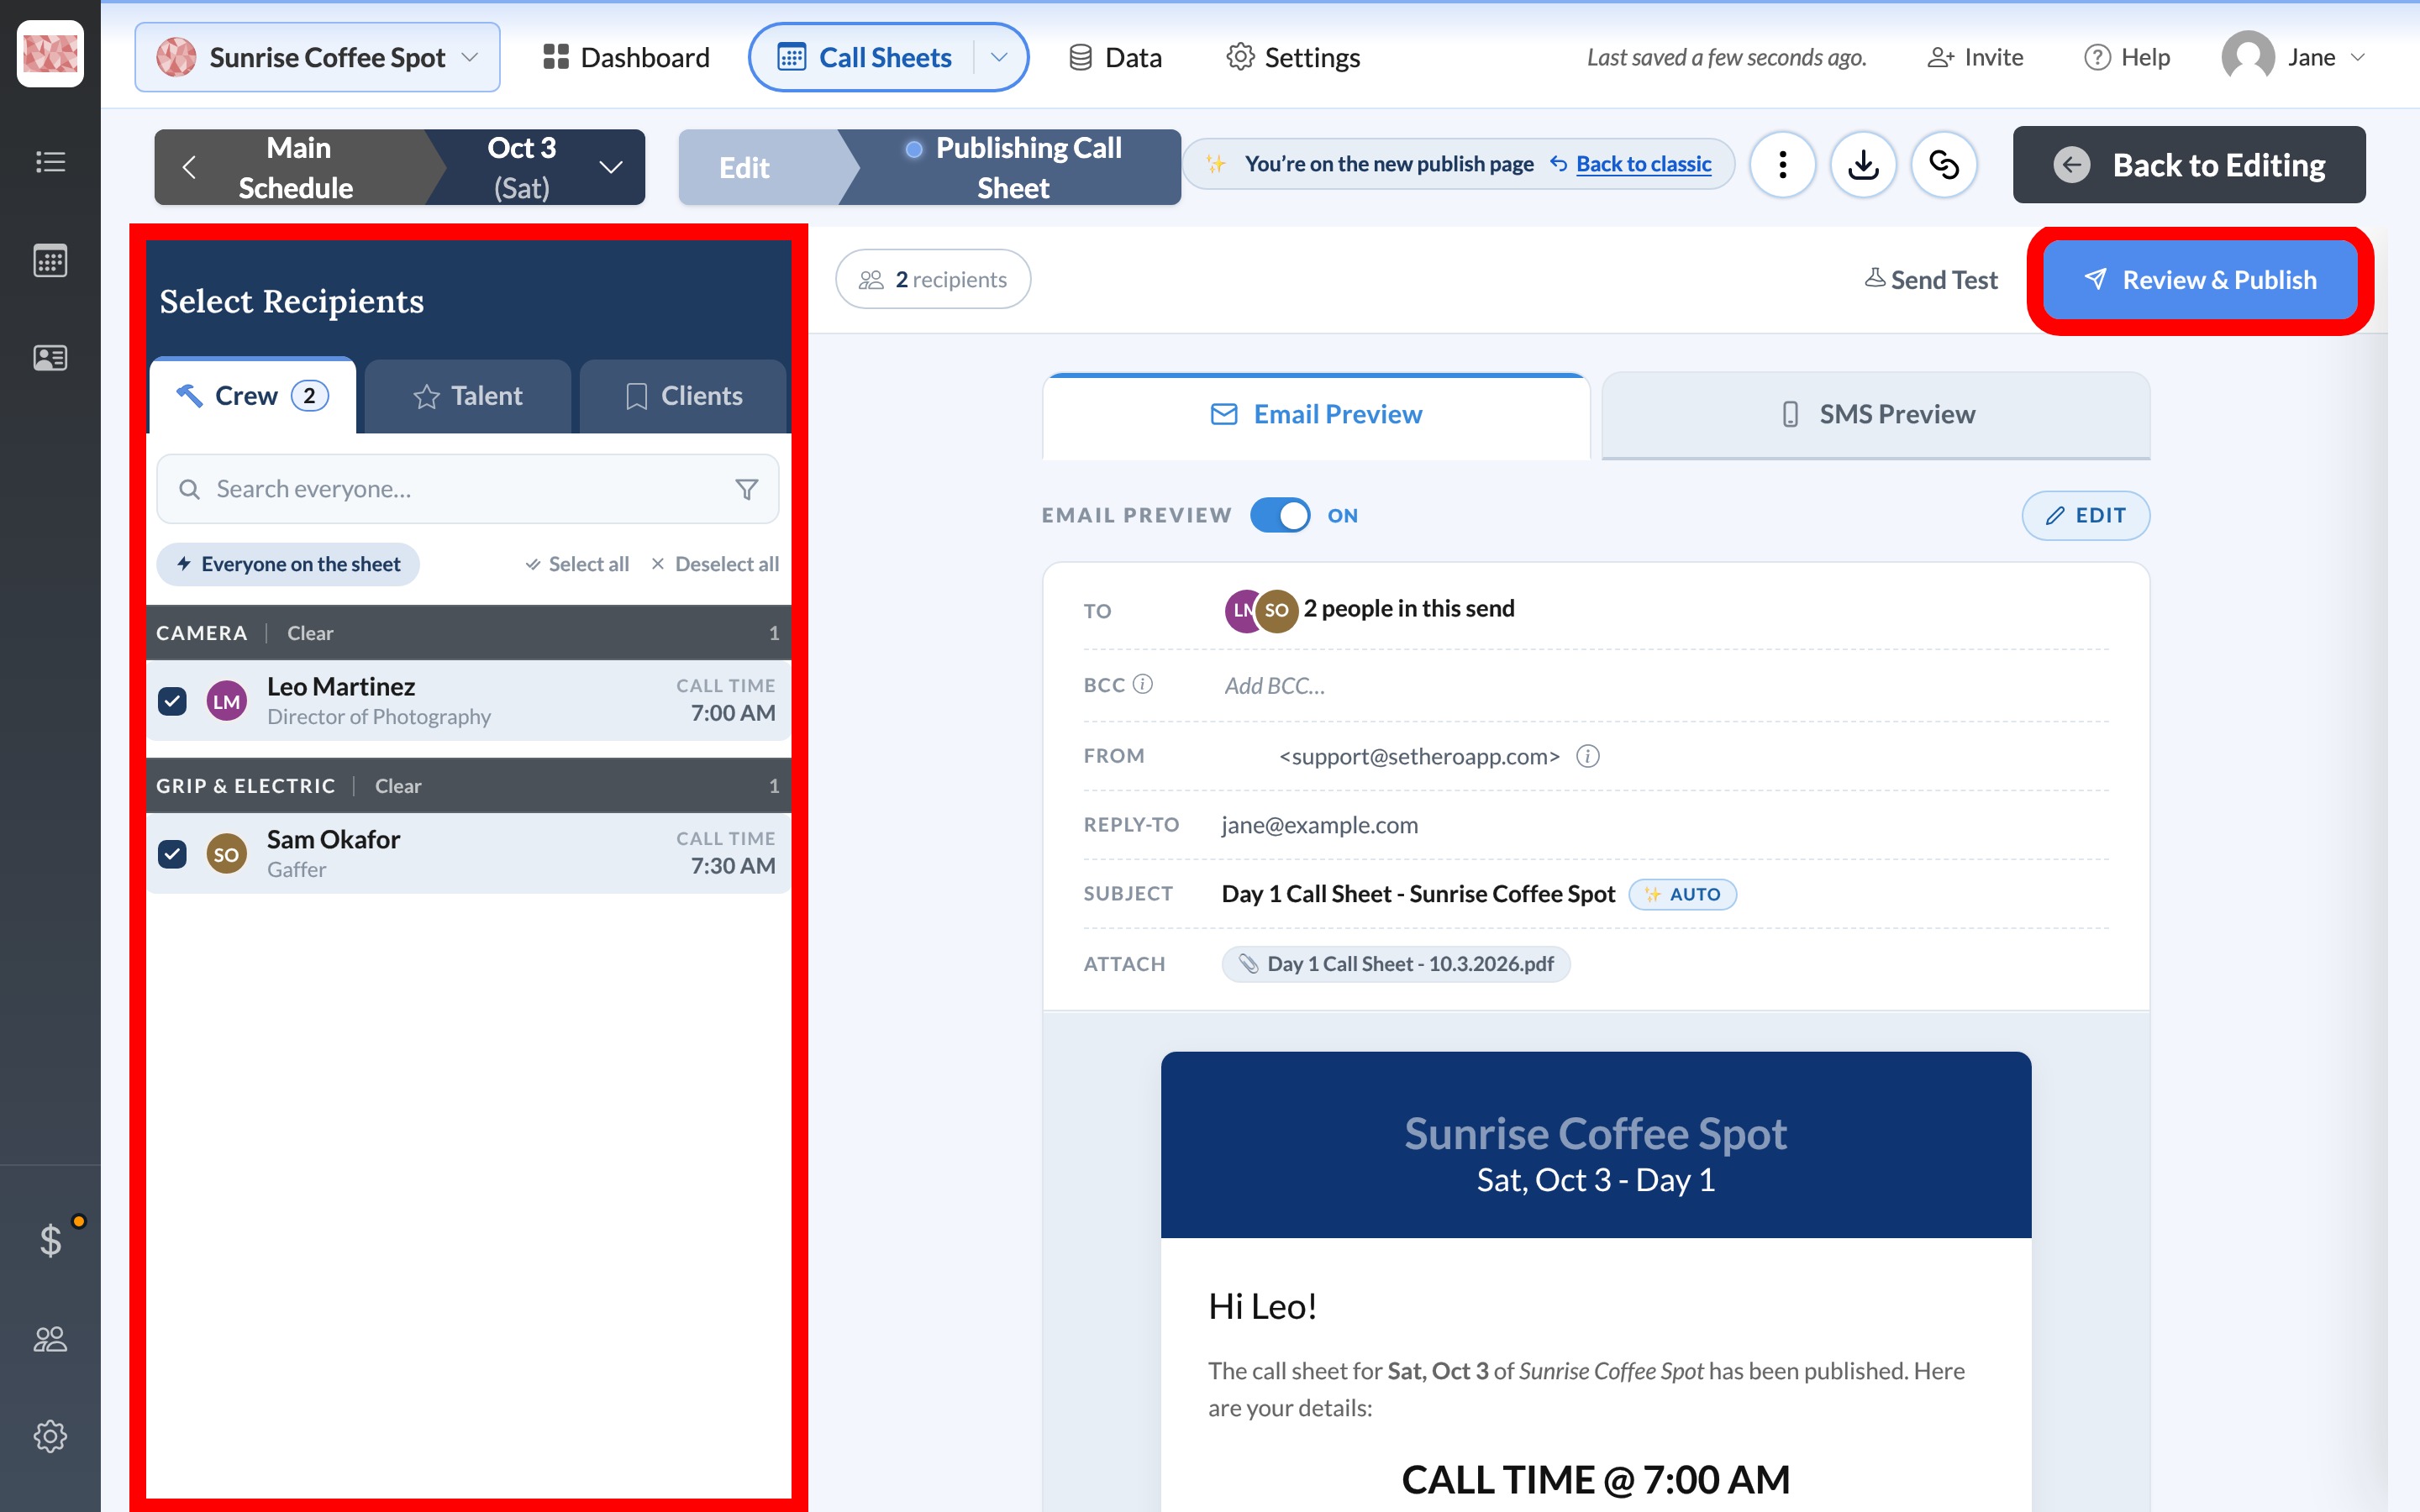
Select Review & Publish to reach the final Ready to send? check.
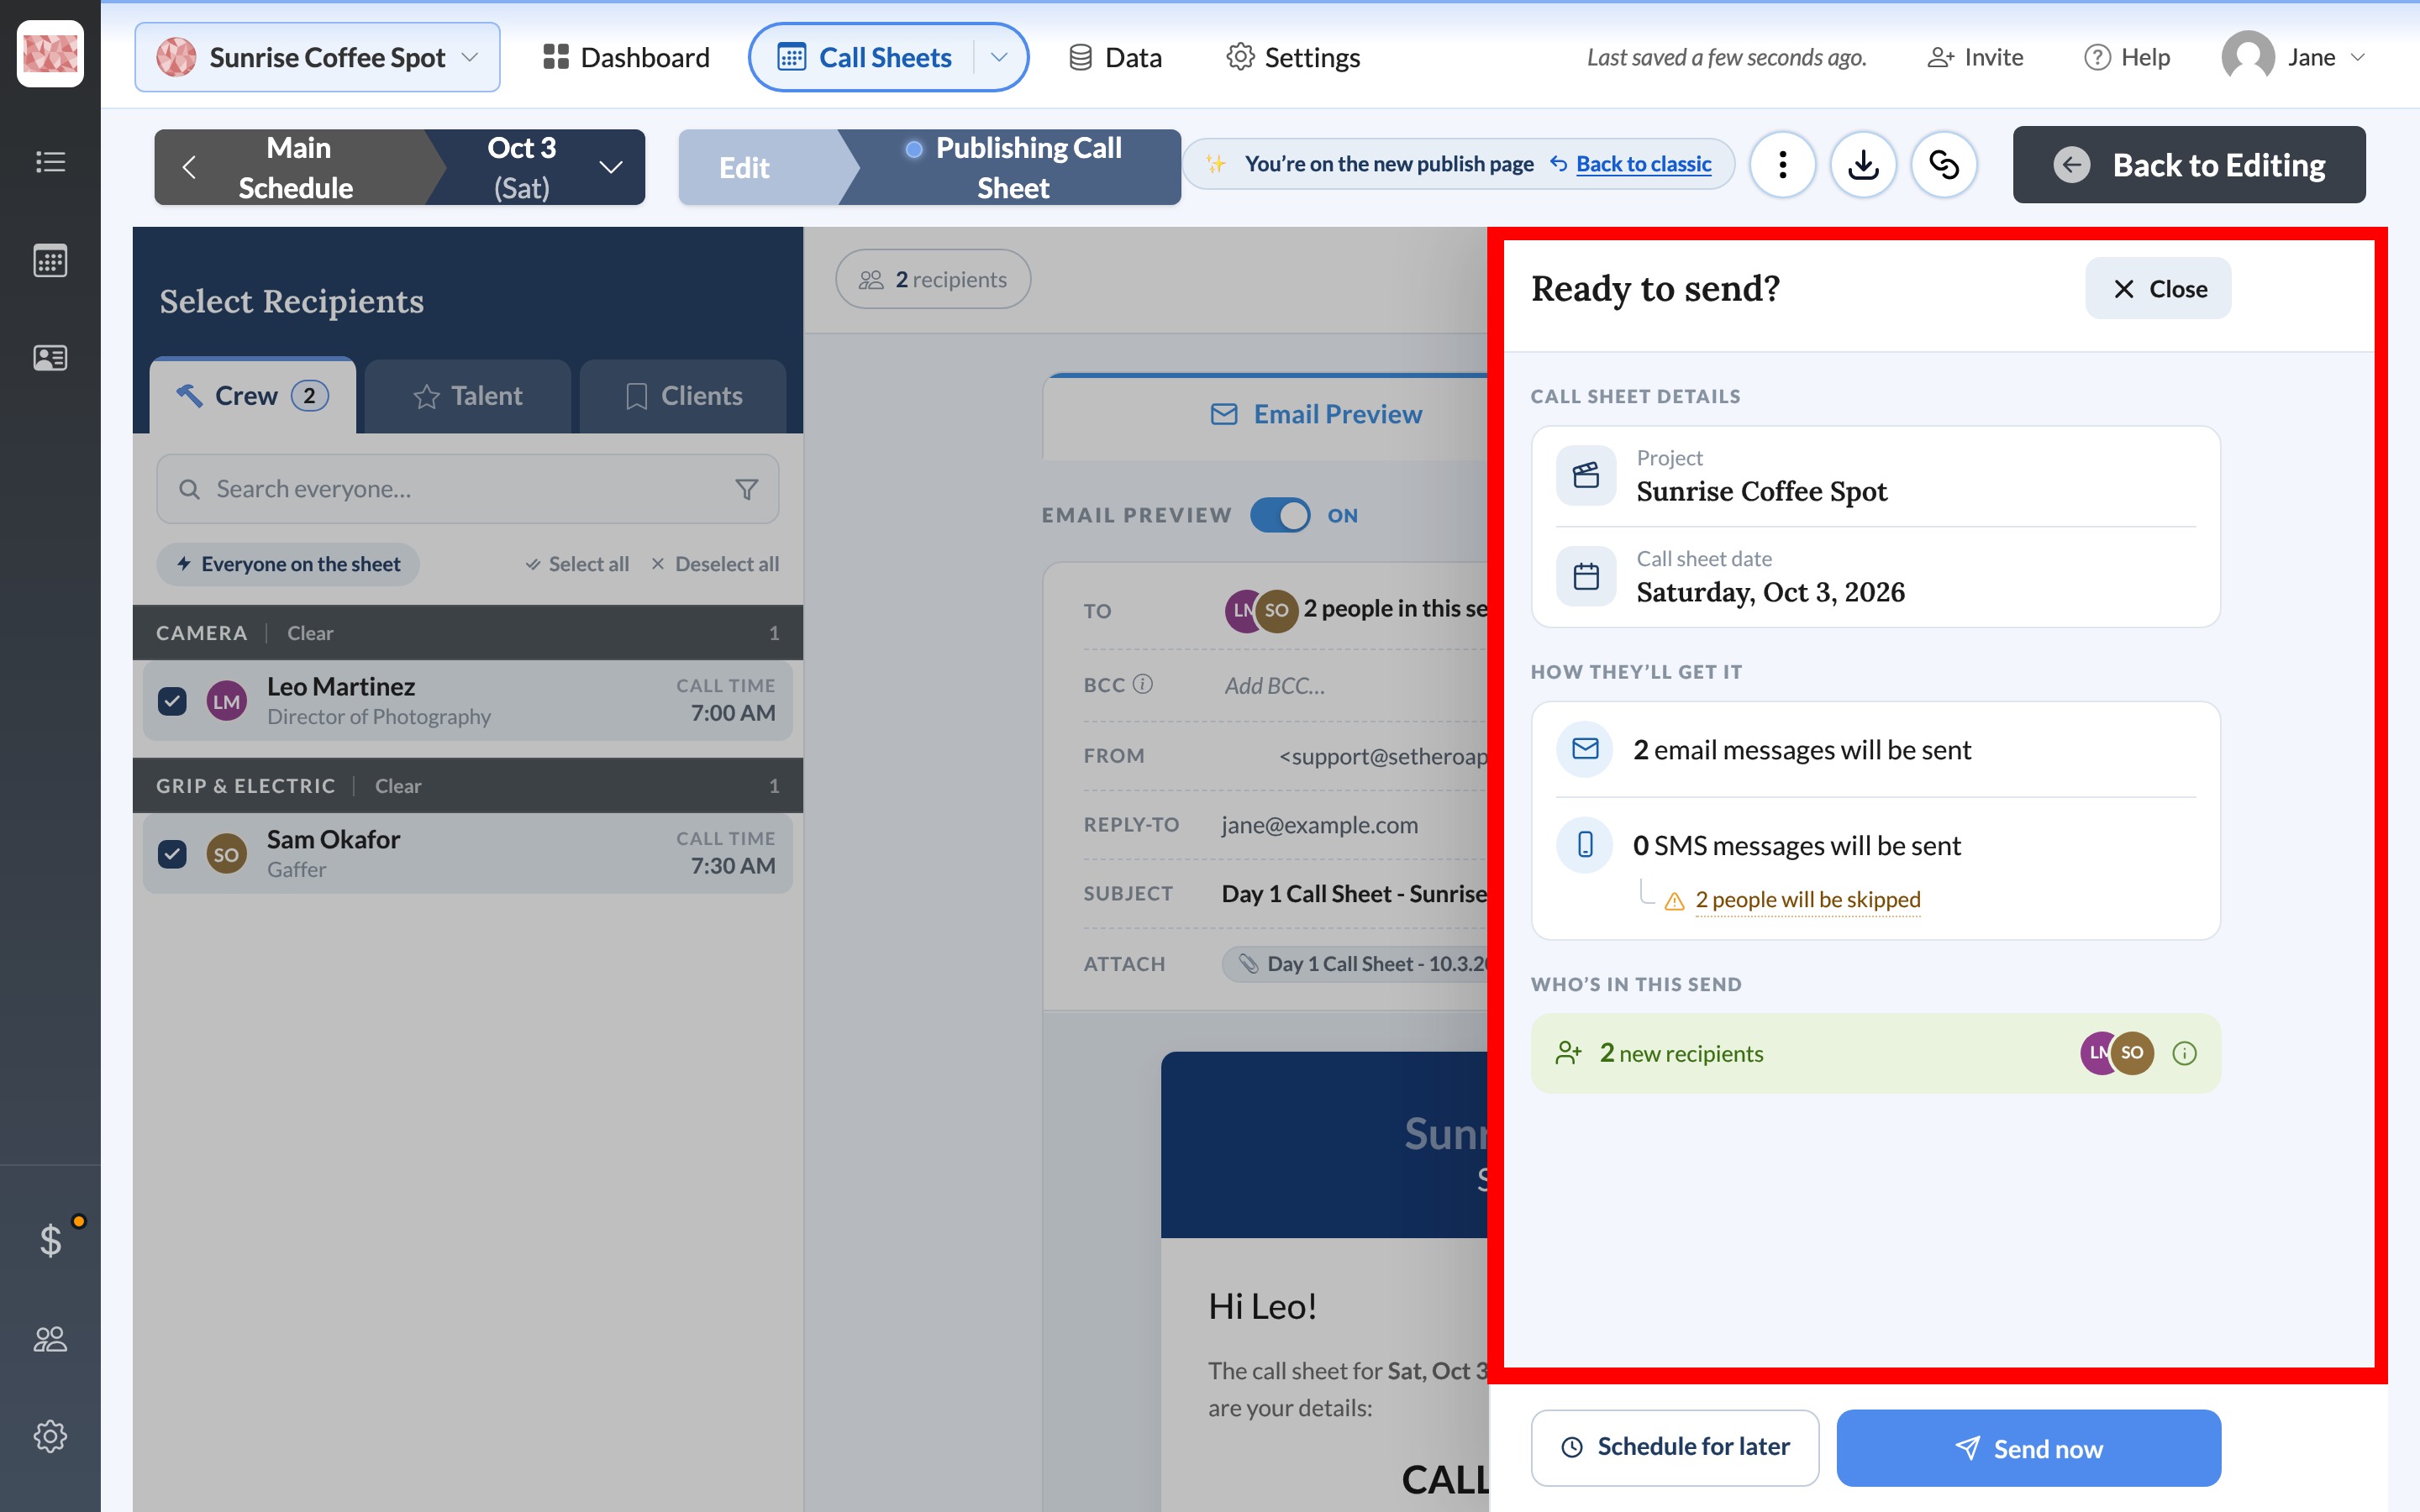
Note: Nothing is sent until you confirm on Ready to send?. This screen also shows who can't be reached. In this example, phone numbers are blank, so email is ready but SMS reports skipped people. Required info for sending email and text explains how to fix that.
Stop here until you're ready to notify people. Publish and send a call sheet walks through the final checks and send, or send a test call sheet to yourself first.
What's next
To see where this work fits, read How SetHero is organized. Then add key people, manage reusable contacts with Add crew, cast, and other contacts, or return to the editor to add more detail.